08/12/2017No Comments

Why I Fell Out Of Love With 3D Printing

3D printing, marvelous isn't it?! Well, yes and no. Let me explain.

Firstly, 3D printing is a great piece of technology. The ability to own a 3D printer, and make physical objects is great. And it's great that 3D printing appears "becoming affordable" too.

In the past I thought there was a gap between 3D digital files, and being able to hold the object. As someone who deals with 3D files on a daily basis, I felt that 3D files should have the potential to be physical, touchable, even breakable. And I do still think that way to an extent.

However 3D printing isn't as glamorous, easy or exciting as I had hoped.

I have found there are several drawbacks to 3D printing which I don't think are often discussed -

You need a very good understanding of 3D modelling - This may seem logical, right? But I'm amazed by how many people, businesses and institutions buy 3D printers, but have very little idea how to create the 3D content to actually print. I have been 3D modelling since I was 17, and I still have to use all my knowledge to make something printable. And to create a model, suitable for 3D printing, takes a hell of a long time. My advice wanting to do 3D printing, make sure you have a good understanding of 3D modelling. You need to know how to modelling anything. You'll soon become bored printing primitive shapes and Yoda! And trust me, 3D modelling isn't something you can learn overnight.

You need an even better understanding of 27 pieces of software, a degree in engineering and thermodynamics - OK I exaggerate, but sometimes it does feel like you need know know a hell of a lot to make something very simple. For example, you want to print a desk tidy? OK let's research the size needed and the design. Let's make the 3D file. Then make sure it meets all the requirements to print. Then let's use several pieces of software to make sure the file is printable, and in a format your printer can read.
OK now we can print. GO! Oh wait, that wasn't supposed to happen. Is my design unprintable? Was the printer extruding too hot? Am I using the right filament? Back to stage 2. Now repeat this process a few times, and you might have a desk tidy. Or you could have gone to the stationary store, handed over £5, and saved yourself a few hours.
OK you generally will want to print something that you can't buy, but the same frustrating, tedious process remains!

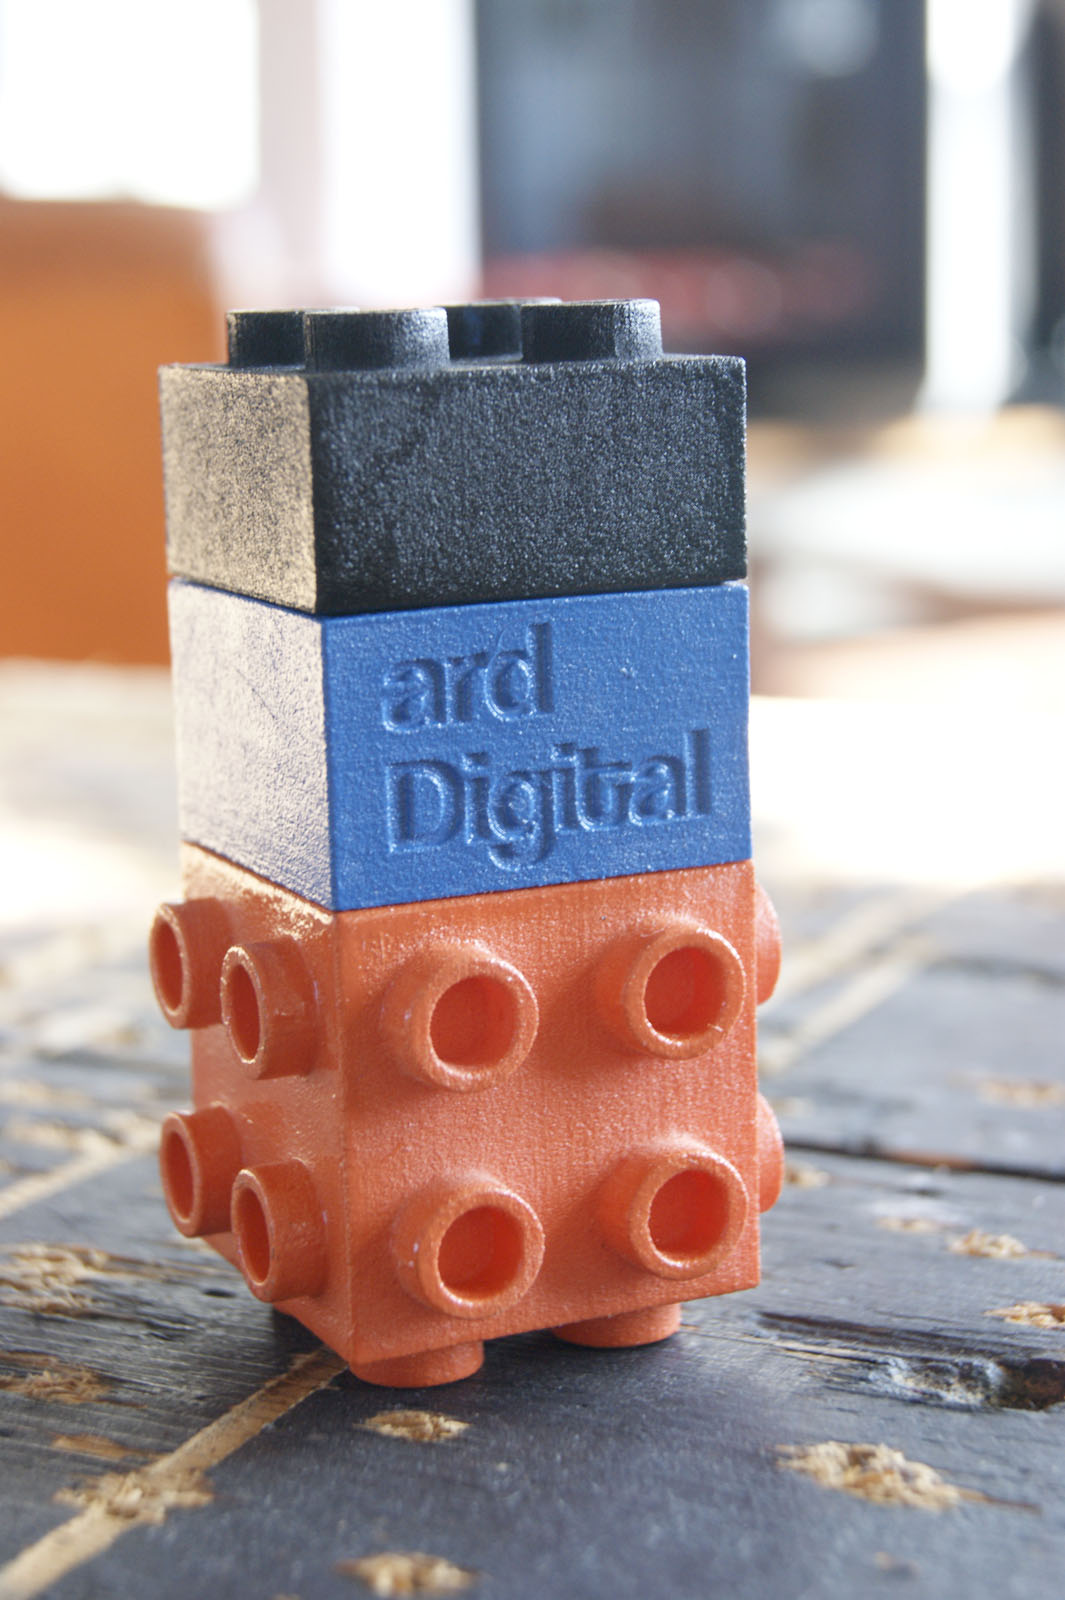
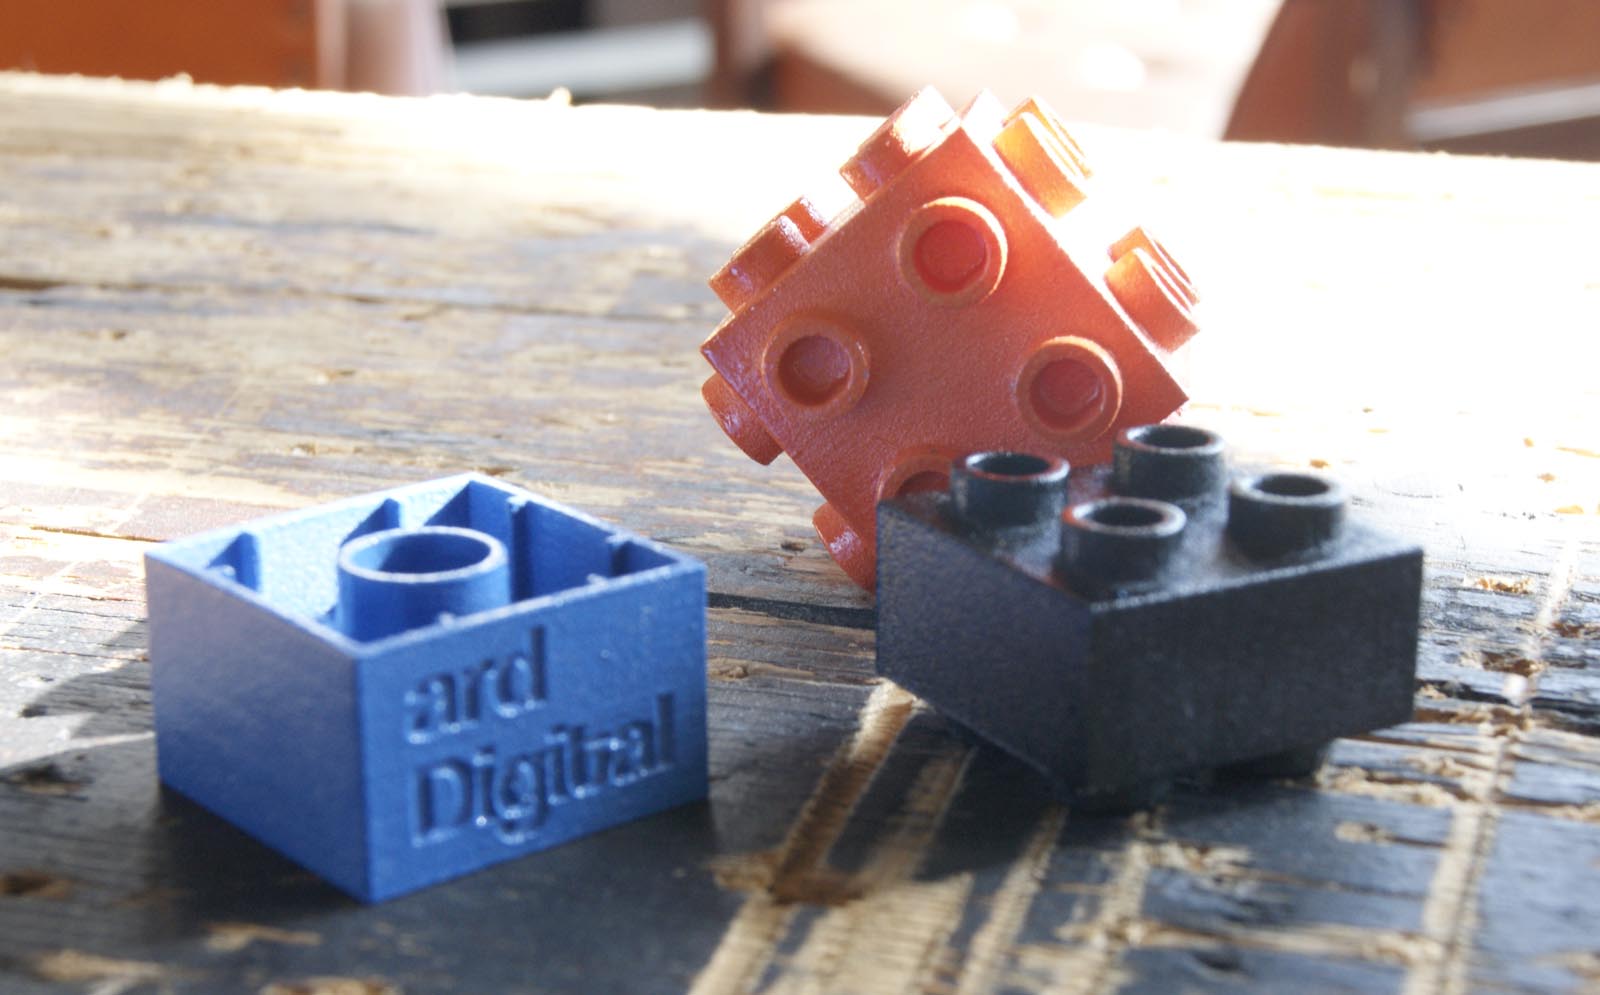
3D printing isn't fast - Following on from the point above, turning an idea into something useable takes a long time. Don't expect to create something with a good amount of detail in under a day, it just isn't going to happen. The only way to get fast results is to try to create the most efficient workflow as possible. For the 3D Printed Miniature Figures we sell, we have a very tight workflow to make the process profitable. However even after creating 100s of miniatures, things still don't go to plan, and we'll easily lose half a day on something very trivial!
Saying all that, you could view 3D printing as being fast. You don't have to wait for manufacturing, minimum run numbers or even shipping. But in a time when we're used to everything being instant, even the fasted 3D printers can feel slow!

It can be a pricey hobby - 3D printers have a huge price range, from £300.00 for a budget desktop printer, to £100,000+ for an industrial grade printer. Here I'm generally talking about the lower end of the price range, definitely sub £5000.00 anyway. An Ultimaker 2, one of the most common and universally known 3D printers, is still £2300.00! That's a lot of cash, especially if you have no commercial use for one. I am surprised the price hasn't dropped a lot more over recent years.
Also maintaining and servicing can add to the cost too. If, or should I say when, something goes wrong, it's going to cost. OK sometimes it might be a £10 part, but it could easily be a lot more if these temperamental machines decide to properly break!

Finally, you'll need time, lot of time - This is perhaps the reason why I'm currently out of love with 3D printing. 3D printing seems to eat up so much time. Whether it's learning the software, tinkering with settings to perfect a print, or disassembling the extruder to remove a blockage, the whole process is time intensive. Perhaps 3D printing is still relatively new, therefore a lot of manual work is still required, but really it doesn't appear to be getting any easier. Maybe I'm inpatient, but if my bike needed as much attention then I'd be hopping on the bus!

So until someone creates a 3D printer offering maintenance free, no set-up require with guaranteed quality, then expect to spend a lot of time scratching your head, googling words you didn't know exist, and swearing at lost allen keys!

Dean

14/06/2016No Comments

Studio Pendant Lights Ready For 3D Printed Shades!

We love 3D printing, so why not use is to add a touch of design to the studio!

3D printing light shades has been something which has been an idea inside my head for far too long, the only thing really holding us back was some suitable light fittings to mount them to. Well today the electricians came round and installed the retro inspired pendant lights to the studio! Needless to say we're very excited!

3D print printing light shade CGI 3D

Pendants installed and looking good!

The pendants are very simple, just a retro cord light fitting and retro bulb. The beauty of these pendants is we can quickly change the pendants whenever we like, and that's just what we plan to do!

3D printed pendants have been done before, but we feel this is a great way to add our own touch to the studio, and by utilising 3D printing technology we can experiment and create almost any design.

3D print printing light shade CGI 3D

3D printed shades inspiration.

The design and creation shades will be a case of trial and error, but that's half the fun isn't it? Some designs will work well, and others may not, but as the cost of 3D printing is a fraction of the price of traditional manufacturing processes then we can quickly alter and iterate designs until we're 100% happy.

So, all we need to do now get designing, fire up the printer and get making! Watch out for future blog posts on the designs and printed shades!

Dean

18/04/2016No Comments

3D Printing is literally child’s play!

Does the future of kids toys lie with 3D Printing?

Anyone who knows me knows I love 3D printing! I also have a very curious 5 year old son, who always wants to see my 3D printer in action and always asks "what are you printing now Daddy?". So when I came across the ThingyMaker, a 3D printed designed to print toys, I was very excited in deed!

The concept behind ThingyMaker is quite simple, you (or your children if you really have to share), can customise and 3D print toys! Yes I've seen 3D printed toys, there are 100s of 3D models available for free to download and print from sites such as Thingiverse, but what ThingyMaker promises to do is make the process as simple and straight forward as possible, so in theory even a child, with little or no knowledge of 3D modelling, or 3D printing, can create their own 3D printed toys.

3d printing toys kids education applicationThe ThingMaker 3D Printer.

The actual hardware inside ThingyMaker doesn't look to offer anything new, it appears to be a single extruder (it prints 1 colour), inside an enclosure, and possibly a heated build plate (although finding exact spec has proven difficult). But to me it has all the essentials it needs as an introduction for kids to 3D printing, and it's even quite cute and toy-like in its design.

3d printing toys kids education application

The ThingMaker Design app.

Alongside the 3D printer is the ThingMaker Design app, which is where you can design and customise your toys. It's available for free on the Apple App Store and Google Play. I downloaded the app, and had a very quick play, and to be honest the app really did exceed my expectations. The way you build your toys is very straight forward and intuitive; you simply drag components into the view-port and the parts snap together, so you know instantly if what your designing will actually fit together. You can then pull, rotate, swap and even colour the different parts. There also appears to be 100's of components, giving you an almost infinite number of possible combinations to build.

I had a very quick play in ThingMaker Design, and came up with some kind of helicopter-space-creature, which had very little "design" and is merely a mash-up of components I stumbled across! However it did show how quickly anyone could manufacture a unique "toy", with no experience of 3D modelling or manufacturing.

3d printing toys kids education application

The Heli-Space-Beast toy, coming soon...

Once you've created your "masterpiece", you can then export it to be 3D printed, and this is the part of the app which really impressed me. The app will de-construct and align all the components so you can print them straight away, and it will even separate the different colours into different prints, so you could in theory print in the correct colours if you have the right coloured plastic filament.

Once the app has done this, you can follow a link on your PC, and you can download the components to then print them on a 3D printer, pretty neat right?

3d printing toys kids education application

Downloading the parts to be printed.

The last step does seem a bit "clunky", but I'm guessing that when the 3D printer is released on sale later this year you won't need to manually download you design and send them to your printer, instead I imagine the app will communicate directly with the ThingMaker printer and automatically print the parts. If it doesn't I'll be very surprised.

But for now we'll just have to do things manually, and I will be testing the printing side of things very soon. Perhaps I'll let my 5 year old have a go, and see what he creates, and of course print it! I'm sure it'll be a random mash-up of skulls, wings and flowers!

3d printing toys kids education application

3D printed toys and parts in various colours.

Being able to design and create unique toys is going to be amazing for children (and us bigger kids), but I also see another massive advantage, you can re-print any broken, lost or even chewed parts in minutes. But will this also de-value the toys? Will there be an unlimited supply of components, or will Mattel be very clever in limiting the number times a certain component could be downloaded or printed? And will they expect users to pay for "special" components via in app purchases? Will we have to buy a licence to make these toys? The price for the ThingMaker (pre-order here) is a mere $300 / £210, which is very cheep for a 3D printer, so I can't honestly see Mattel selling the printer at this price, and giving away all it's content and apps for free, they just wouldn't make any money, would they?

But here's a thought, will Mattel expand on its current offerings? Will they allow users to 3D print other items, perhaps Barbie accessories, or Hotwheels cars? Will I be able to even print non-toy items, something like a broken oven knob, or remote control battery cover because mine has gone walk-abouts again?

The whole concept of printing toys at home certainly seems very novel and fun. I believe the "fun" will be in the designing, printing and constructing the toys, rather than actually playing with them, much in the same way as a child may play with playdoh; the fun is in the process rather than making something to keep. But to me the ThingMaker is more than just a toy, it's a way to make 3D printing accessible to everyone, and to become part of a normal household, much in the same way as PCs and mobile phones have become over the past 20 years.

Once people see the potential uses for 3D printing, people will want to learn, engage and to fully see how 3D printing can be more than just a novelty. 3D printing, I predict, will become part of our everyday lives, but as to whether it's just for fun, or for something more serious, only time will tell.

Until then, I'm going to have fun creating!

Dean

20/01/2016No Comments

3D printed miniatures aren’t just miniature!

3D printed miniatures come in all scales. Over the past few months we have been 3D scanning and printing 3D model railway folks in what's know as 16mm (16mm = 1 foot), but if you were to buy 3d printing pen, you'd know that the print size can be almost anything.

Over the past 2 days we've printed miniatured from 2cm to 20cm high, all to suit different model scales. The 3D scan can be scaled to to any size, which is one of the advantages of working with digital files!

SONY DSC
From tiny to large, we print in a range of sizes!

The largest "miniature" here is the driver, standing at 20cm high! The smallest is only 2cm tall. The size difference is large, but the process of 3D scanning and 3D printing is largely the same.

SONY DSC
A 16mm figure looking very smart!

16mm is the most common scale we print, meaning the miniature stand at around 10cm high, with the smaller two models being 2cm and 4cm high. 16mm is a great size to work with, you can see a lot of detail in the miniature, and it's a great size to paint and hold.

miniatures_03_1600-1024x682

Printing at smaller scales can be very tricky, the printer only has a certain resolution, and also the strength of the prints is decreased as we reduce in size. You would struggle to break the largest model even by jumping on it, however a child could snap the smallest print quite easily! A miniature at 2cm high is really the smallest we could print at.

If you're interested in having your very own miniature model, please get in touch!!

23/12/2015No Comments

Merry Christmas! Here’s to 2016!

Well it's that time of year again....

....so first of all, Happy Christmas everyone!

We're almost at the end of 2015, and I find it's always great to look back at what we've done over the past year. We can smile and pat ourselves on the back at the great work we've produced, but also to reflect on the hurdles and obstacles from the year!

I hope this year has been a great one for you, I know we've had a good year, producing some great work for you guys! As usual we've focused on creating architecture, interior, and product CGIs, but we also explored other area such as 3D printing and virtual reality. I find it's always great to explore and play, even if it's just to glimpse at what might be!

So I'll leave you with a short selection of our interesting 2015 projects for you to browse with a mince pie and sherry....

Student Mattress Room Set -

interior cgi bedroom matress student visualisation

The student mattress room set was a continuation from 2014, but is still worth of a mention. We really enjoyed working on this project, partly down to the fact we were given a lot of creative freedom with regards to the set design, and also to how well the final image turned out. It was technically challenging matching the CGI with the real air mattresses, but the end result was worth the extra effort!

New Broadway -

architecture arch viz vis building residential 3d cgi

2015 saw an increase is architectural visualisations for us, and the New Broadway project was perhaps one of the more interesting projects to work on. The images were photo-composites, set at dusk, which meant we could play with light and colour much more than a typical day-time CGI.

Construct & Configure Interactive Application -

interactive configurator kitchen realtime cgi interior

The Construct & Configure app finally went live this year, and although it's not 100% finished, it shows the potential of what we can do, and the direction we see things going in the next few years! We will be finishing and improving the app, and it will be used by clients to interactively visualise their products. Give it a go if you haven't already!

3D Printed Miniature Figures -

3d printing print scan scanning subutteo

As part of our need to explore and play with new tech, we have been busy with the 3D printer and scanner, turning folks into miniature figures! We honestly didn't know what would happen when we bought the printer, and it still feels very novel, however the miniature model railway guys have been taking advantage and we've been producing miniatures to go along with their trains, platforms and scenery!

There's been so much more happening in 2015 which I haven't mentioned, from virtual reality, to kitchen CGIs, along with all the other little things which crop up, and perhaps get lost along the way!

In 2016 we of course want to continue to produce amazing CGIs, animations and interactive projects, and as usual we will continue to play and explore! On our "wish list" is a VR headset, perhaps an Oculus Rift, or HTC Vive, which will allow us to really see what the future may hold! Also we will most likely launch another website, dedicated to the 3D scanning and printing, as the interest in this niche is definitly something we want to expand.

Also, away from the "doing", we want to attend more events, exhibitions, and such to make sure we're surrounded by new and exciting things. We'll be travelling all over the UK to various cities and events, so if you want to meet-up for a brew, chances are we could be passing by some time soon!

So that's it for 2015! Time to step away from the PC for a week, re-charge, rejuvenate, and hit the ground running in 2016!

Dean

19/10/2015No Comments

WutheringBytes 2015

A couple of weeks ago I attended WutheringBytes over at Hebden Bridge to demo, show and explain 3D scanning and 3D printing.

WutheringBytes was set-up by Calderdale Council, to allow the public, companies, and anyone else to learn, engage and be a part of various technologies from numerous individuals and organisations. The wealth of technologies within our local area is fantastic, and I hope this event help to open people's eyes to just what's out there.

For my part in the event, I ran a 3D scanning and 3D printing demo. Through out the day I scanned anyone who wanted a go at turning themselves into digital versions.

3d scan scanning print printing

3D printer and scanner ready to go!

The response to the 3D scanning was fantastic, people couldn't wait to be scanned, and see themselves in digital 3D form! The scanning takes a few minutes, and as such the person being scanned has to stop completely still, which is harder than you'd think! The best response to the scanning was from the crowds of primary school children, who all wanted a go!

3d scan scanning male

A 3D scan from the day.

I will be sending the 3D scans to each person once I've had chance to sort and tidy the 3D files, and if they agree, I'll upload the scans so anyone can print or play with the 3D files.

I also gave away 3D printed bottle openers, some freshly printed that day. A penny coin slips into the bottle opener to give a hard edge to stop the plastic from breaking.  This is actually the last one I have from around 100 being printed! There's also the same bottle opener, but has ard Digital logo incorporated. I must print a few more!

Blog_WutheringBytes_3

3D printed bottle opener.

So that's what I got up to at WutheringBytes, be sure to keep an eye out for next years do, I'm sure it'll be a good one!

Dean

19/05/2014No Comments

3D Printer Arrives at Ard Digital

After recent success with 3D printing using several external 3D printing companies, I decided to take the plunge and invest in a 3D printer, and here it is, a FlashForge Creator!

ad_blog_3d_printer_01
Image: Printer hiding away.

One of the key reasons for purchasing a printer, rather that using external companies is speed. In previous posts I had mentioned that the turnaround from sending a 3D file, to the time it is delivered is from my experience around 2 weeks. Don't get me wrong, 2 weeks is fast considering how long it would traditionally take to manufacture some of the items I created, however I felt that for 3D printing to be really useful, it needed to be even faster and easier.

ad_blog_3d_printer_02
Image: Dual printer nozzles.

Another reason for purchasing the printer was cost. Just ordering a handful of items to be printed externally, most of which were novelty to be honest, cost quite a lot, so by printing items in-house, the long term costs is reduced, even if the initial investment is high. Owning a printer also means that designs can be pushed and tweaked, as the cost of a failure is minimal, with time perhaps the biggest loss.

ad_blog_3d_printer_03
Image: Printing!

The printer works by layering very small layers of molten plastic on top of each other. Each layer is less than 1mm, it can be as low as 0.1mm, and as the print head moves forward, backwards, left and right, the yellow plate moves up and down to control the height.

ad_blog_3d_printer_04
Image: Mini me?

The printer builds 3D prints from bottom to top, so when designing and printing items on this printer, real consideration has to be made as to how the printer can actually print it. For objects where there overhangs, the printer can build supports, which are easily snapped off the print, but do require some cleaning up afterwards.

ad_blog_3d_printer_05
Image: Printed miniature.

Once objects are printed, the prints can be finished, or left as they are, depending on the purpose of the print. The finish of a print straight from the printer can be bumpy and rough to touch, but I see the prints in a similar way to a carpenter would see a piece of wood from a lathe, they still need refining, painting, sanding, or what ever finishing technique is required.

ad_blog_3d_printer_06
Image: Miniature close up.

3D printing is truly fascinating! Anyone who comes into the office is transfixed by how it works, and the incredible things it can produce. Needless to say I am still getting to grips with the printer and the processes involved, but it's certainly something I will continue to experiment with, and I guess only time will tell where this leads to!

If you would like to know more about 3D printing, rapid prototyping, modelling making, or anything else, please feel free to get in touch!

Dean

02/05/2014No Comments

3D Printed Custom Duplo Blocks

Carrying on from previous posts and test, I decided to experiment further with 3D printing by creating custom Duplo blocks with the help of a 3d printing london. Currently my 3 year old son is fanatical about Duplo and Lego, so for his birthday I though it would be nice to make some unique parts for his collection.

I didn't want to just copy some Duplo parts, that would be pointless as genuine Duplo bricks can be bought for a lot less that it would cost to print, and the quality of Duplo is far superior to 3D printing too. So I decided to make some unique parts, which as far as I know, can't be purchased anywhere.

After throwing around some ideas, I decided to 3D print 4 items, 2 double sided pieces, one cube, and one birthday cake (well it was my son's birthday!). I measured several original Duplo pieces to figure out the general dimensions, transferred the measurements to the 3D software, and adapted, build and created the custom blocks in 3D. The 3D files were then sent away again to 3D Print UK to be printed in nylon, and this is what came back in the post a week or two later....

3D Printed Duplo Blocks

The printed blocks generally fitted very well with the original Duplo blocks, and overall again the print quality was excellent.

With these blocks, I wanted to make them fit further with the original Duplo, so I decided to finish them using either spray paint, or Airfix paint. Bright, saturated colours were chosen to again fit with the Duplo blocks.

3D Printed Duplo Blocks

Most blocks required several layers of paint to achieve a consistent colour. The cake block was the trickiest to finish, as this required small parts to be painted by hand. The last time I did this was as a kid myself!

Overall I'm very pleased with how the blocks have come out. Creating the designs in 3D and having them printed was defiantly the easiest part, and hand painting was the most difficult. On the painted 3D blocks, you can still see the 3D printing layers,

which leaves a rough, bumpy finish. Perhaps for future prints it might be interesting to experiment with different techniques for achieving a smoother finish, such as sanding, or using a high-build paint primer.

Now it's time to hand them over to my son, let's hope he likes them!

If you would like to know more about 3D printing, rapid prototyping, or anything else, feel free to get in touch, contact details are on the contacts page.

Dean

25/04/20141 Comment

3D Printed Custom Pen Holder

Following on from the 3D printed chair model blog post where I printed a chair model I created for a client, this post focuses on a 3D printed pen holder which was designed by myself and printed by 3D Print UK. The main purpose behind creating this model was to create something functional, unique, fun and intricate.


ard_digital_3d_printed_pen_holder_06

The pens sit neatly behind the angular polygonal front panel. Extruded and embossed text was added to give the panel depth and to also experiment with the tolerances of the 3D printer.

ard_digital_3d_printed_pen_holder_03

The initial design used hollow cylinders to hold the pens, but the design was quickly modified with unusual geometric circles. One of the advantages of 3D printing is the freedom to create these intricate details without worrying how these parts could be constructed.


The translucent effect from the nylon material always looks good in natural sunshine. It seemed a shame to paint this, however I really wanted to see how well the intricate parts would come out.

ard_digital_3d_printed_pen_holder_04

Black aerosol spray paint was used first. Several thin coats were applied to avoid any paint runs. The extruded text was then finished with white Humbrol air fix paint.


ard_digital_3d_printed_pen_holder_08

This 3D printed pen holder has impressed myself with the level of detail achievable. The finishing of print is perhaps the downside as even after numerous layers of spray paint the print layers are still very visible. Perhaps a thick primer would give a smoother finish, however in this instance I didn't want to lose the text detail on the front.

I think this piece really outlines what 3D printing is currently all about, the ability to quickly turn and idea from a basic concept, to a physical item you can use. It might not be a "polished" piece, but as a tool to explain or demonstrate ideas or design quickly, 3D printing is absolutely brilliant!

If you would like to know more about 3D printing or rapid prototyping please feel free to get in touch!


27/03/2014No Comments

Incredible 3D Printed Coasters

3D printing is something I've been keeping a careful eye over the past year or so. I find the technology and possibilities absolutely incredible, and in the very near future I truly believe that 3D printing will be common place in every office, business, and home.

Last year I ordered a sample kit from Shapeways which shows a few of the materials which can be printed. I have this sat on my desk, and every time I show it to someone they generally comment "What? All of this is 3D printed?" which always brings a smile to my face.

But I wanted to create something myself, and as I know how to make things using 3D software, it made the itch even more tempting to scratch. To make things even more tempting, with the Shapeways sample kit comes store credit so the first prints are free.

To create any 3D printed objects, you first need to create the 3D content. In my case I used 3D Studio Max, the same piece of software I use for creating visualisations and animations, but almost any piece of 3D software can create the data needed for printing.

I decided to print 2 coasters for this little test. I chose to create coasters as they would take relatively little time to create in 3D, and I wanted something nice to sit on my desk!

This screen-shot shows the coaster inside the 3D software. If the 3D model were to be used in an image, time would be spent refining the edges and giving them a nice chamfered finish, however with 3D printing we will naturally achieve rounded corners to an extent. If we wanted smoother larger chamfers on the 3D print, then we would need to add this detail in 3D, before printing.

ard_digital_3d_printed_coasters_01

When creating the 3D models it's important the design looks nice, but also there are quite a few design rules to consider and understand, before sending the model to be printed. Shapeways has some great tutorials and explanations on how to create 3D models for printing, but in a nutshell, the models has to be thick enough and strong enough to be printed. Designing the models so they meet Shapways' design rules can be one of the longest parts of the process, but something that can't be skipped by. In the case of the "ard Digital" coaster, the "d" was extented to meet the outer circle, and the two words overlapped to give strength to the designs.

The Peugeot Lion coaster took longer to create in 3D due to its complexity, and after a few revisions, mainly making parts slightly thicker, it was also ready.

For the coaster I chose to print in Strong and Flexible Plastic. The "ard Digital" coaster was printed in white, and the Peugeot coaster was printed in a polished red version. I wanted to see the difference between the two, other than the price.

Anyway, after submitting the 3D models, the arrived back a few days later.....

ard_digital_3d_printed_coasters_04

I must say that I haven't been excited about new technology in such a long time, but this was definitely exciting! Maybe it's because I can see the potential for 3D printing, or perhaps it was because I usually create images, animations and other digital content, which is never a physical thing, unless you count prints, so to be able to hold and play with something I have created is incredible.

ard_digital_3d_printed_coasters_02

This is a close up shot of both coaster. Perhaps the difference in finish isn't too clear, other than the colour, but when you're holding them the polished coaster is noticeably smoother and more refined, and the white coaster is rougher, with a texture similar to that of a strong mint.

So that's my first taste of 3D printing, now my head is whirling with ideas and possibilities, and I'm probably not going to sleep for a week! Overall I'm incredibly impressed with the process, and the end results. They have surpassed my expectations, and I really can't put them down! All I can really say is that this won't be the last you'll hear from me on the subject of 3D printing!

Dean

LIKE WHAT YOU SEE?

WANT TO KNOW MORE?

USEFUL LINKS

Site Map
Privacy Policy

Punch Infinity
Switch
Archive
Contact
Subscribe

INSTAGRAM FEED

Wrong or no access token.

PUNCH DIGITAL

Punch Digital Services Ltd

Registered Office :
Peel Walker
11 Victoria Road
Elland
HX5 0AE

Company No:
07938732

VAT No:
GB 282 4398 77