05/06/2015 — No Comments

Interactive Configurator Launched

Over the past few months, I have been working with a web development team to create a new interactive application, which utilises the flexibility of CGI with some web programming magic. We wanted to create an application to allow users to interactively configure anything, then share, save or print their configuration.

The application has been given it's own brand new website, check out www.constructandconfigure.com to see what all the fuss is about, and to play with the two demo applications.

The application is a "configurator" and has been designed to enable users to change finishes, features and other options by clicking on buttons to access menus. In the kitchen demo, the user can change the kitchen finish, the door handles and the worktops, but almost any visual element of a product, space or architecture could be configurable. In the kitchen demo we could if we wanted to add the ability to change the appliances, the stools, or even the floor and wall finishes. This is one reason why using 3D is great, we can create these CGI variations quickly, store them digitally, and present them in a way which is quick and easy for the end users to see.

The interactive kitchen demo application.

The application has been designed to work on most modern devices, PCs, laptops, tablets, smart phones, iPads and anything else with a modern web browser and a reasonably fast internet connection. We wanted to make the application accessible to as many people as possible, so it made sense to make the application run inside a web browser, without the need for any software downloads.

As standard, we have added 3 features to the app, save, print and share. The save button will download an image, overlaid with a description of the configuration, to your device. The print function simply prints the configuration, and again with a description so you know exactly the chosen configuration. The share button is perhaps the most complex function, but something we felt was required to allow users to share their configuration quickly and easily. When the user clicks the share button, a pop up window is displayed with a unique web address. The user can then highlight, copy and paste this address to Twitter, Facebook, email or anything else. When the address this then re-opened in a web browser, the users configuration is displayed. For this app we wanted to avoid user log-ins and passwords as we wanted the experience to be fast and user friendly, and using a unique web address works perfectly.

The app works on touch screen devices, as well as a traditional mouse.

We see this app to be primarily used to visualise and configure products. A sales team could use the application to show potential buyers the various configurations of their product, which may help the buyers visualise their potential purchase, and hopefully secure a sale. Similarly the app could be used in show rooms, where it's physically impossible to show all the product variations, but with the app customers could quickly and easily see any configuration they wish.

The application could be used by housing developers to show potential house buyers their new home, and then allow them to choose fixtures and finishes, which many house builders now allow. The possibilities for the app is limitless!

Use the app on the go, but be careful using it on 3G or 4G as data charges may occur!

The application has been fully custom made to suit our requirements. We did this for one important reason, we can modify, change, or add features to the application when required. The application is web based, and with the advances in HTML 5, more and more is possible. As an example we could add a clip board, user log-in, or even link the app with an e-commerce website allowing the users to purchase directly from the app.

View the configurator anywhere.

Currently the configurator doesn't allow the user to build products, they can't alter the kitchen layout for example, but this isn't why we created this application. In order to visualise the products in a photo realistic manor, the app uses pre-rendered CGI images, layered on top of each other to create the users configuration. Advances in real-time visualisation has shown we can create almost photo-real visuals using technology such as Unity 3D or the Unreal game engine, however using this kind of software means the users have to download plugins or software suitable for their device, which is something we didn't want to do. In the future I'm sure this will change, but for now we believe our current approach is the best way!

So head over to http://www.constructandconfigure.com and play with the application demos.

If you have any questions or comments about the configurator, please get in touch!

Dean

08/05/2015 — No Comments

3D Interactive Furniture Demo 02

In-between projects I continue to tinker and play with new tech, software, and areas of interest. Usually these side-projects are different from the typical 9-5 projects, but allow myself to look, play and develop new technology and ideas.

Anyway, following on from 3D interactive test 01, this latest revision shows some changes, mainly the inclusion of drop-down menus, and a new way of rotating around the object (the user now clicks and holds down the left mouse button, then moves the mouse) is much nicer to use.

At this stage of development, the main purpose of these demos is to build functionality, hence the very standard looking menus, but once the functions and workings of the app are working, adding the finer detail and visual elements is the easier part (in theory!). For example, take a look at this beautiful sun tan chair along with other comfy and elegant furniture on this website.

Launch 3D Interactive Furniture Demo 02

3D_Furniture_Interactive_Test_02

The app is built with Unity 3D, which very knidly allows the app to also install and run on mobile devices as well as the web. An augmented reality version is also being developed which I will record very soon to show.

Any comments, please let me know!

Dean

25/03/2015 — No Comments

3D Interactive Furniture Demo 01

Recently Unity3D (a fantastic piece of software to create interactive projects and games) became free, along with features such as real-time lighting, and fancy materials.

I've wanted to have a play with Unity3D for a while, so during a bit of downtime I opened it up and created a quick test project to experiment with and play....

Launch 3D Interactive Furniture Demo 01

3D Interactive FurnitureA screen grab from the demo.

At the moment, to change the furniture style, press buttons 1, 2, 3, 4, and use your mouse to rotate around the chair, and the mouse wheel to zoom in and out.

The next stage is to add buttons (some programming needed, which I know very little of!), and to also give options to change colours of parts of the furniture. The app can then be ported to tablets, phones, desktops, as well as websites.

Currently the 3D Interactive Furniture Demo is a very basic demo, only really scratching the surface of what is possible.

24/03/2015 — No Comments

Digital Room Sets Will Never Be Built

"Digital room sets will never be built."

This is a realisation I had whilst working on a current digital room set project, and it's not something I've ever thought about before. With architectural visualisations and product CGIs, the purpose of a 3D visualisation is to preview or to sell something, that one day will become real. A CGI of a building is pretty good representation of how the end architecture will look, and so estate agents can sell the house before it's built. The same goes for products. These things will be built, and I love seeing the real thing, and then comparing the digital to the real.

Room sets though will never be built. The products that sit in the digital rooms may one day be manufactured and sold, some might even be available now, but the room will never exist, and it's almost certain to say that the exact configuration of a kitchen or bedroom shown within a CGI is very unlikely to be exactly replicated.

Digital room sets are entirely 3D polygons, computer generated textures, and simulated lighting. Wooden beams, or a stone chimney breast are only pixels, with little consideration is often made to whether these architectural features would be strong enough, durable, or even possible in reality. So long as they look correct and give the impression of realism, then that's usually as far as the design will go.

ad15_portfolio_bi-folding_doors_black_featured_image

An alpine digital room set to visualise bi-folding door.

By removing the need for these room sets to be built, we can allow ourselves to build digital room sets which might not exist in reality. The 3D room set used in the Student Mattress Room Set Project doesn't exist in reality, but it could. However by removing the constraint of the room needing to the accurate, strong, and true to technical aspects such as building regulations, the temptation can be to create something un-realistic.

ad15_portfolio_bi-folding_doors_mahogany_featured_image
A student digital room set created to visualise a new mattress.

With 3D there are no size or design constraints, we can make rooms as large, unusual, wacky as we feel. This can sometimes be a mistake. For example, with the student room set, we could have easily made the set 10m wide, with elaborate architectural detail, modern furniture, and so on, but it would have quickly not looked like a student room at all. Yes the furniture we added is slightly unusual, and the room is perhaps more elaborate that the student rooms I remember from my University days, but it's still believable, it could be made like this. I believe this balancing act is key to creating a great interior digital room set. Realistic 3D models, materials and lighting only work well if the design and architecture is spot on to begin with. As I've said already, structural and other constraints don't apply in 3D CGI projects a literal sense, but they do apply in a believable sense.

There is the other side of the coin with to the lack of constraints, and this is we as artists and designers have total freedom to create what we want. If you want to show your product on the edge of a volcano, or even on the moon, then CGI and 3D magic can make these possible, at a tiny fraction of the cost of doing it in real life.

Digital room sets can also be stored away on tiny hard drives, archived for later use, amends, or new products. There's no need to de-construct the set, and there are no time limits on how long a set can stay constructed for. Digital room sets can also be quickly changed, re-styled, and given a new look very quickly. Check out the interactive applications over at the interactive page to see more about how interactive applications can be used in conjunction with digital room sets.

Anyway, I'm straying from my original point slightly. To the average viewer, a digital room set may look no different to a traditional, photographed room set, and I guess that's why digital room sets prove popular with clients and customers. My point is that for all the design, styling and virtual construction work, the sets are merely polygons and pixels, and will never be built, touched or experienced in the real world.


Digital room sets will never be built....

....and this makes me sad....

....but I think I'll be OK!


Dean

19/05/2014 — No Comments

3D Printer Arrives at Ard Digital

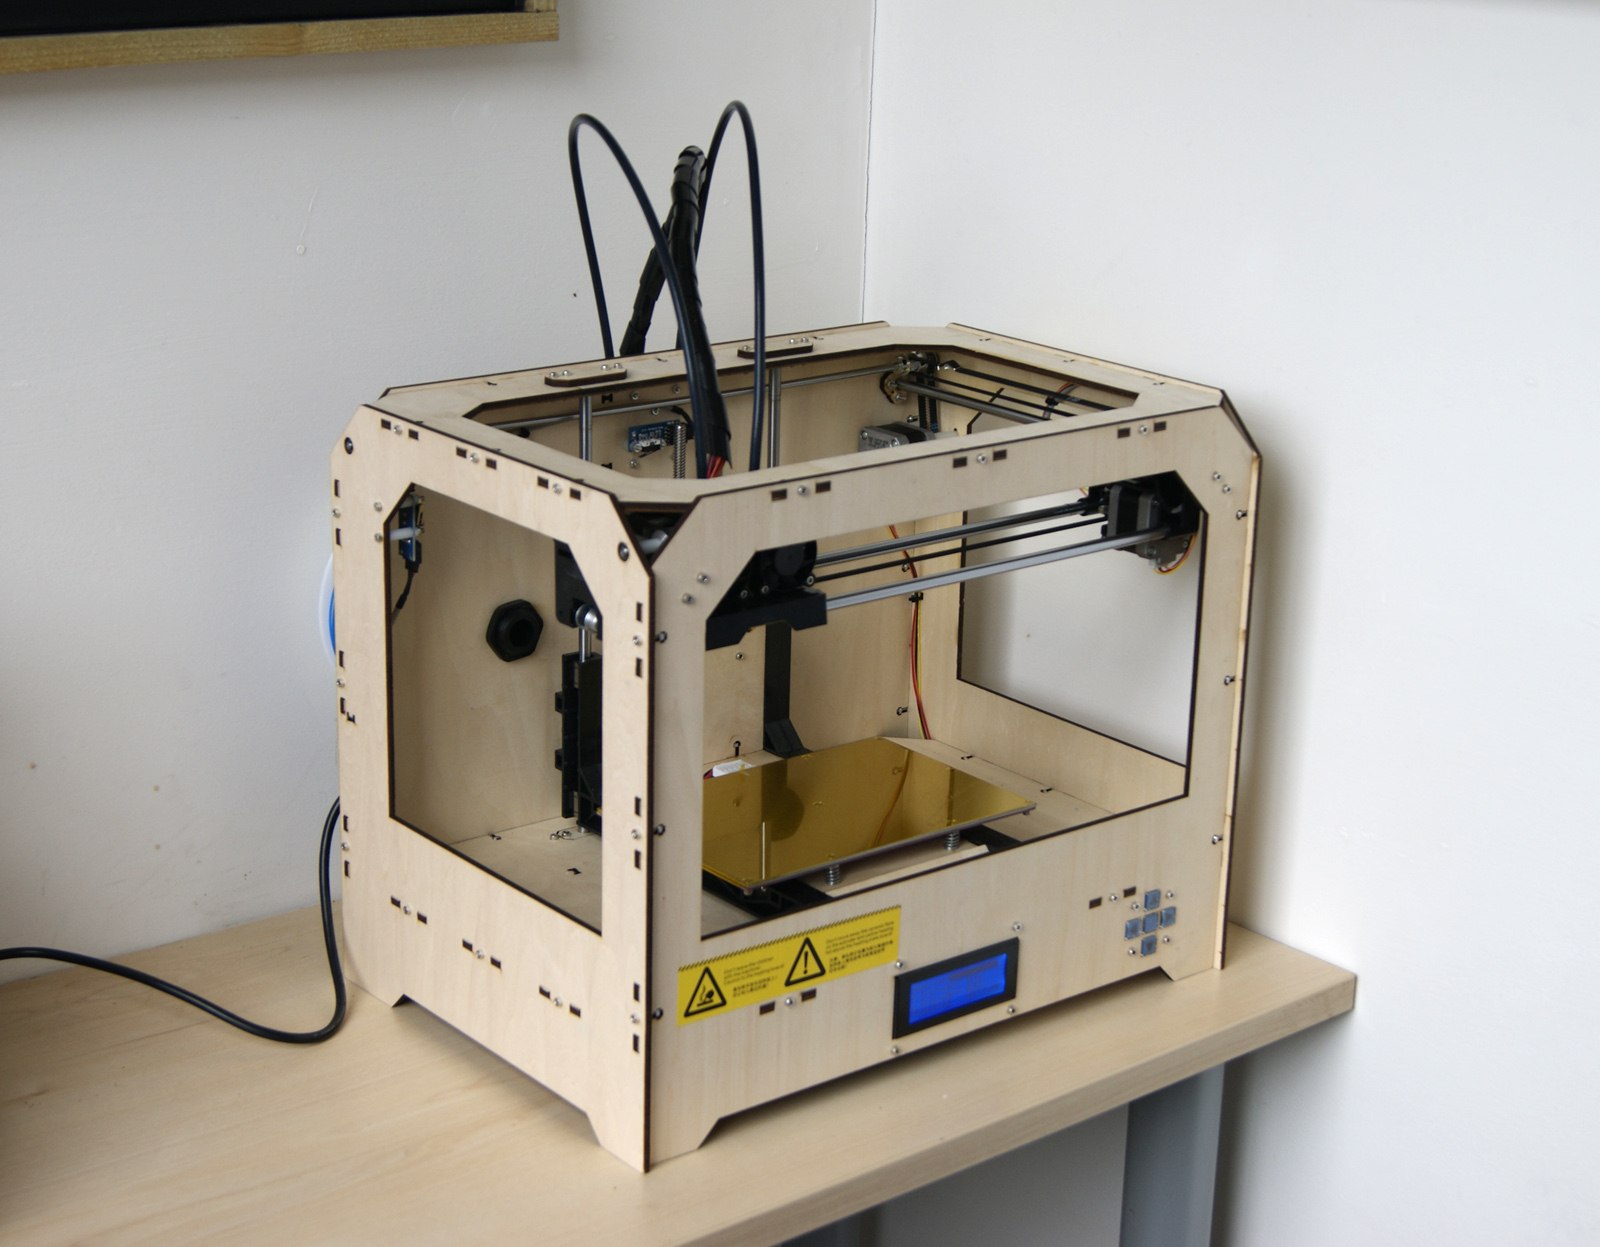
After recent success with 3D printing using several external 3D printing companies, I decided to take the plunge and invest in a 3D printer, and here it is, a FlashForge Creator!

ad_blog_3d_printer_01
Image: Printer hiding away.

One of the key reasons for purchasing a printer, rather that using external companies is speed. In previous posts I had mentioned that the turnaround from sending a 3D file, to the time it is delivered is from my experience around 2 weeks. Don't get me wrong, 2 weeks is fast considering how long it would traditionally take to manufacture some of the items I created, however I felt that for 3D printing to be really useful, it needed to be even faster and easier.

ad_blog_3d_printer_02
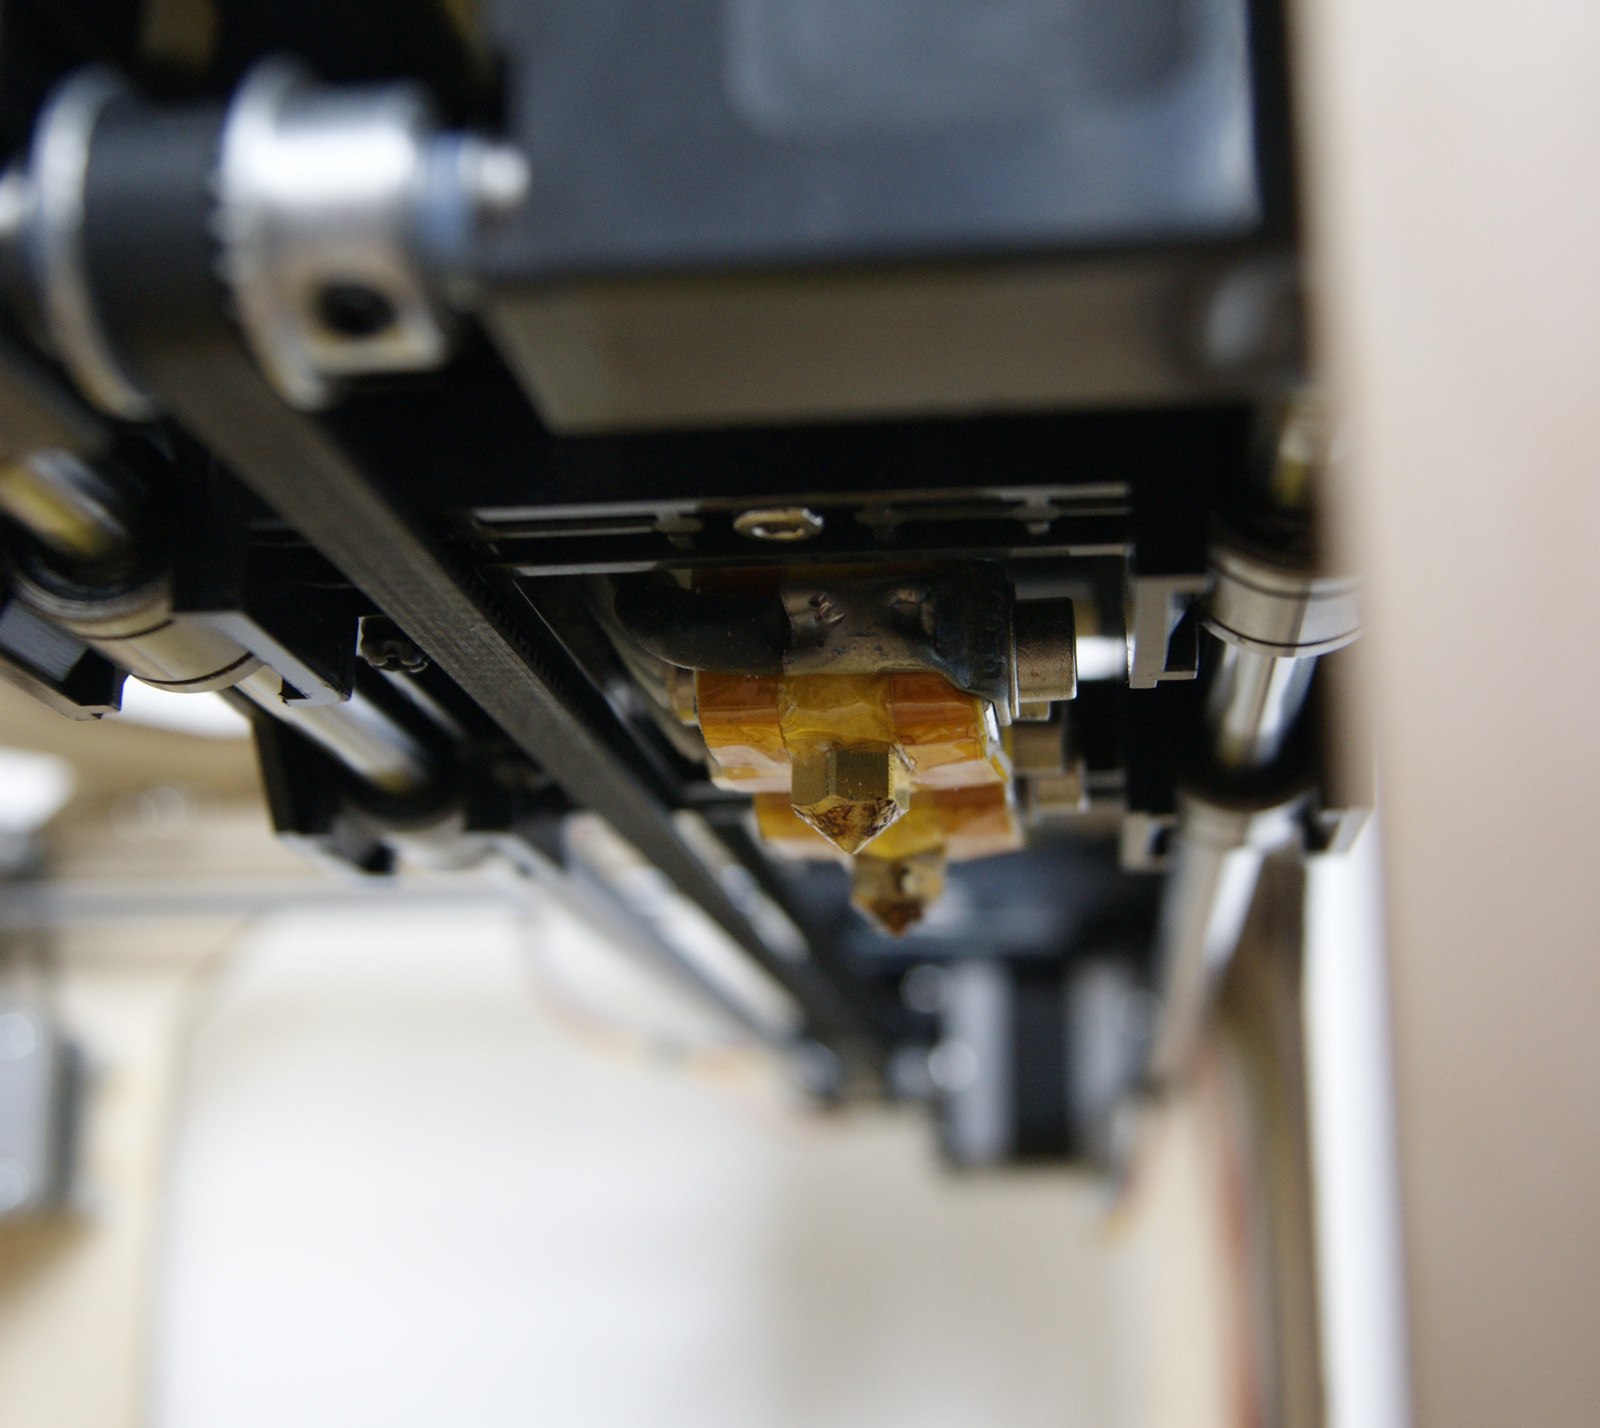
Image: Dual printer nozzles.

Another reason for purchasing the printer was cost. Just ordering a handful of items to be printed externally, most of which were novelty to be honest, cost quite a lot, so by printing items in-house, the long term costs is reduced, even if the initial investment is high. Owning a printer also means that designs can be pushed and tweaked, as the cost of a failure is minimal, with time perhaps the biggest loss.

ad_blog_3d_printer_03
Image: Printing!

The printer works by layering very small layers of molten plastic on top of each other. Each layer is less than 1mm, it can be as low as 0.1mm, and as the print head moves forward, backwards, left and right, the yellow plate moves up and down to control the height.

ad_blog_3d_printer_04
Image: Mini me?

The printer builds 3D prints from bottom to top, so when designing and printing items on this printer, real consideration has to be made as to how the printer can actually print it. For objects where there overhangs, the printer can build supports, which are easily snapped off the print, but do require some cleaning up afterwards.

ad_blog_3d_printer_05
Image: Printed miniature.

Once objects are printed, the prints can be finished, or left as they are, depending on the purpose of the print. The finish of a print straight from the printer can be bumpy and rough to touch, but I see the prints in a similar way to a carpenter would see a piece of wood from a lathe, they still need refining, painting, sanding, or what ever finishing technique is required.

ad_blog_3d_printer_06
Image: Miniature close up.

3D printing is truly fascinating! Anyone who comes into the office is transfixed by how it works, and the incredible things it can produce. Needless to say I am still getting to grips with the printer and the processes involved, but it's certainly something I will continue to experiment with, and I guess only time will tell where this leads to!

If you would like to know more about 3D printing, rapid prototyping, modelling making, or anything else, please feel free to get in touch!

Dean

12/05/2014 — No Comments

Apline Lodge CGI Breakdown – From 3D polygons to print

In this blog post, I'm going to give a very brief overview and breakdown of how an image goes from 3D polygons to an image ready for print.

alpine_lodge_quick_breakdown_half

Image: From polygons to print

Recently I completed the Alpine Lodge CGIs. This project is typical of the way I construct a CGI room set, and as the images were really nice to work on, I thought I would explain and break them down to show various stages.

When working in the 3D software, in this case 3D Studio Max, previews are used to visualise the scene. Typically wire frame views, and simple shaded views will be used when constructing the 3D elements. This gives quick feedback to anyone involved in the project, as the composition and arrangement is quite clear to see. It does look untidy, and there is no lighting, but this kind of view is instant, unlike a final image, which can take several hours to compute and render.

alpine_lodge_quick_breakdown_wireframe

Image: 3D software wire frame preview

When constructing room sets, or even architectural projects, generally only what is going to be seen in the final image will be create. This is purely to save time. Objects behind the virtual camera are discarded, unless seen in reflections, and building or rooms float in an empty virtual world.

alpine_lodge_quick_breakdown_set

Image: Digital room set

After the set is constructed, lighting effects, material properties, and other detail are added. Now the images are starting to look like the final image. The image below shows how the 3D software produces the image. It isn't a one click solution, and time spent lighting and fine-tuning can be just as long, if not longer, than constructing the room set. The aim with this rendered image is to have a nicely balanced image, ready for post-production.

alpine_lodge_quick_breakdown_render-1

Image: 3D render

The image produced from the 3D software wasn't quite right, the image was too dark, parts of the image were the wrong colour, and the background needed to be adjusted. Some artists will try to achieve the final image solely inside the 3D software, but I find this very counter intuitive, as simple adjustments can be made in software such as Photoshop. When working in the 3D software, I want the image to have enough depth, colour range and contrast to make changes in post-production quick and easy.

alpine_lodge_quick_breakdown_final_image

Image: Final image ready to print

I also use a process of layers, adjustments and fine-tuning to control the image to control the finish, colour and look of the final images, perhaps I'll go into more detail on another blog post in the future, keep watching!

Dean

02/05/2014 — No Comments

3D Printed Custom Duplo Blocks

Carrying on from previous posts and test, I decided to experiment further with 3D printing by creating custom Duplo blocks with the help of a 3d printing london. Currently my 3 year old son is fanatical about Duplo and Lego, so for his birthday I though it would be nice to make some unique parts for his collection.

I didn't want to just copy some Duplo parts, that would be pointless as genuine Duplo bricks can be bought for a lot less that it would cost to print, and the quality of Duplo is far superior to 3D printing too. So I decided to make some unique parts, which as far as I know, can't be purchased anywhere.

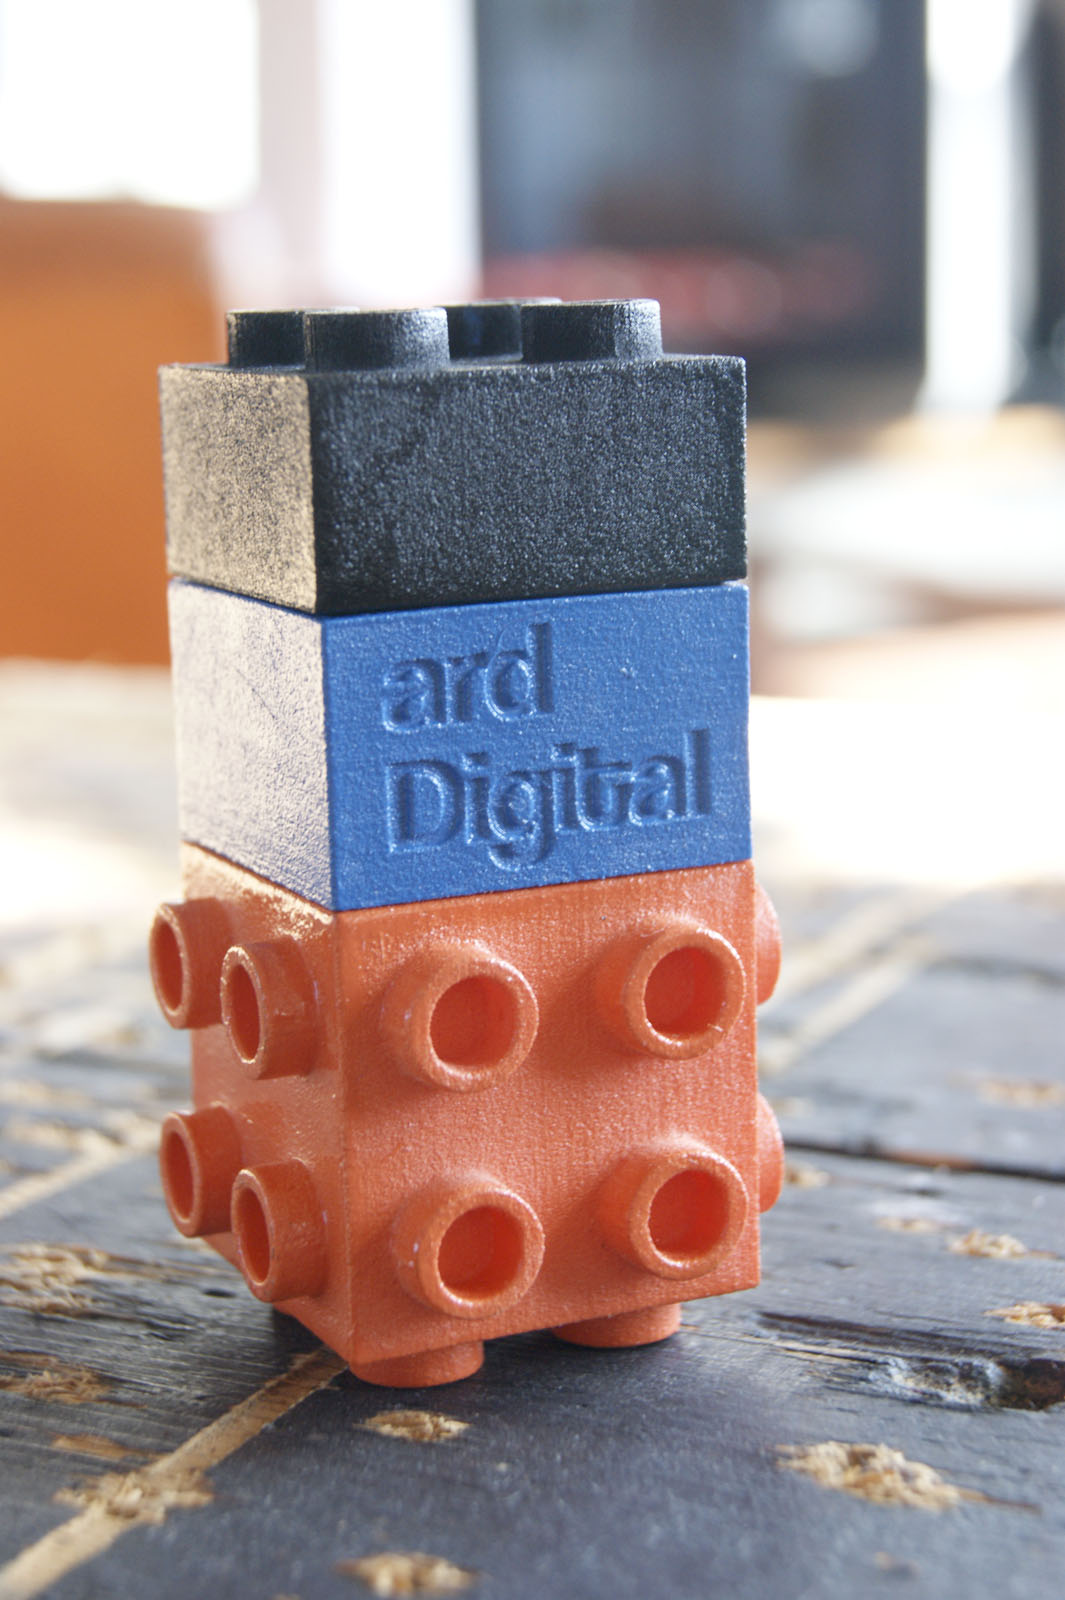
After throwing around some ideas, I decided to 3D print 4 items, 2 double sided pieces, one cube, and one birthday cake (well it was my son's birthday!). I measured several original Duplo pieces to figure out the general dimensions, transferred the measurements to the 3D software, and adapted, build and created the custom blocks in 3D. The 3D files were then sent away again to 3D Print UK to be printed in nylon, and this is what came back in the post a week or two later....

3D Printed Duplo Blocks

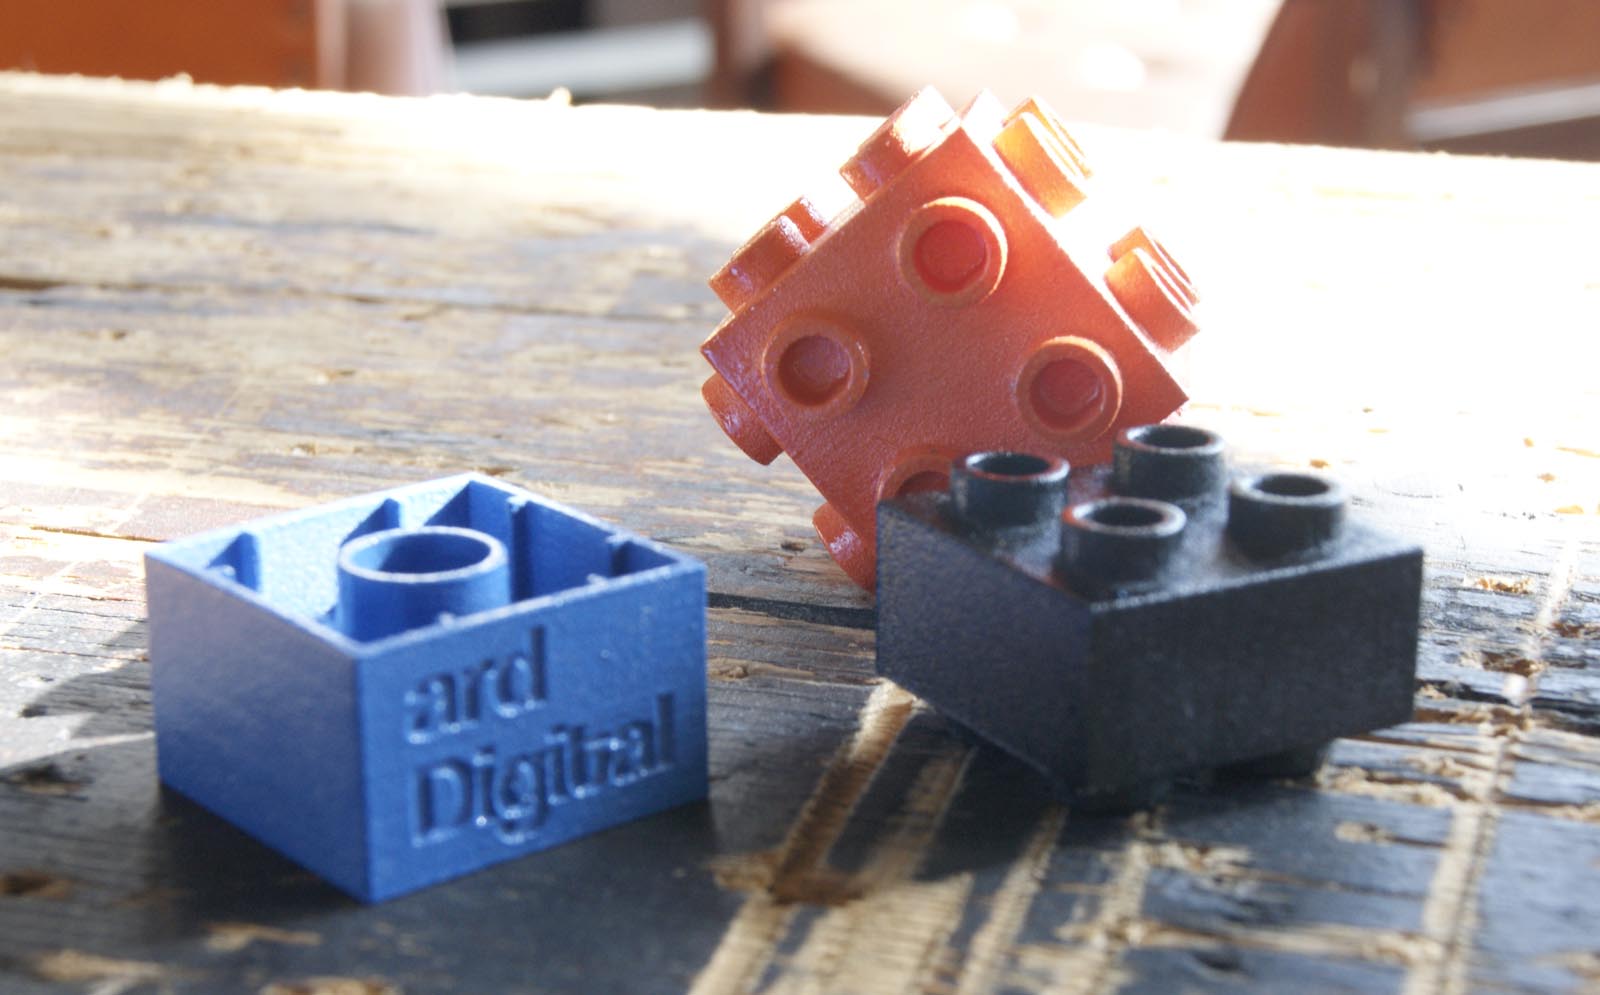
The printed blocks generally fitted very well with the original Duplo blocks, and overall again the print quality was excellent.

With these blocks, I wanted to make them fit further with the original Duplo, so I decided to finish them using either spray paint, or Airfix paint. Bright, saturated colours were chosen to again fit with the Duplo blocks.

3D Printed Duplo Blocks

Most blocks required several layers of paint to achieve a consistent colour. The cake block was the trickiest to finish, as this required small parts to be painted by hand. The last time I did this was as a kid myself!

Overall I'm very pleased with how the blocks have come out. Creating the designs in 3D and having them printed was defiantly the easiest part, and hand painting was the most difficult. On the painted 3D blocks, you can still see the 3D printing layers,

which leaves a rough, bumpy finish. Perhaps for future prints it might be interesting to experiment with different techniques for achieving a smoother finish, such as sanding, or using a high-build paint primer.

Now it's time to hand them over to my son, let's hope he likes them!

If you would like to know more about 3D printing, rapid prototyping, or anything else, feel free to get in touch, contact details are on the contacts page.

Dean

25/04/2014 — 1 Comment

3D Printed Custom Pen Holder

Following on from the 3D printed chair model blog post where I printed a chair model I created for a client, this post focuses on a 3D printed pen holder which was designed by myself and printed by 3D Print UK. The main purpose behind creating this model was to create something functional, unique, fun and intricate.


ard_digital_3d_printed_pen_holder_06

The pens sit neatly behind the angular polygonal front panel. Extruded and embossed text was added to give the panel depth and to also experiment with the tolerances of the 3D printer.

ard_digital_3d_printed_pen_holder_03

The initial design used hollow cylinders to hold the pens, but the design was quickly modified with unusual geometric circles. One of the advantages of 3D printing is the freedom to create these intricate details without worrying how these parts could be constructed.


The translucent effect from the nylon material always looks good in natural sunshine. It seemed a shame to paint this, however I really wanted to see how well the intricate parts would come out.

ard_digital_3d_printed_pen_holder_04

Black aerosol spray paint was used first. Several thin coats were applied to avoid any paint runs. The extruded text was then finished with white Humbrol air fix paint.


ard_digital_3d_printed_pen_holder_08

This 3D printed pen holder has impressed myself with the level of detail achievable. The finishing of print is perhaps the downside as even after numerous layers of spray paint the print layers are still very visible. Perhaps a thick primer would give a smoother finish, however in this instance I didn't want to lose the text detail on the front.

I think this piece really outlines what 3D printing is currently all about, the ability to quickly turn and idea from a basic concept, to a physical item you can use. It might not be a "polished" piece, but as a tool to explain or demonstrate ideas or design quickly, 3D printing is absolutely brilliant!

If you would like to know more about 3D printing or rapid prototyping please feel free to get in touch!


02/04/2014 — No Comments

2D Photo to 3D Virtual Model to 3D Physical Print

3D model libraries exist to allow digital artists to quickly populate their scenes with appropriate content. Using libraries for 3D models can be a time saver, and as such saves money and costs. But what happens when a specific model cannot be found in any library? This can happen quite often, perhaps an architect would like a particular bench outside their building, or an interior designer would like to see a specific item of furniture in their lounge.

The solution is to build the 3D models manually. Using as much information as possible, the 3D artist can turn drawings, dimensions and other references into 3D models. The accuracy of the 3D models is highly dependant on what information can be found. If the item to be modelled can be physically held, studied and measured, then the model will be more accurate than a model created from a handful of photos.

In a recent project I was asked to model the Dark Cross Dining chair.

Black Cross Dining Chair

From the website, we have the above image, and some basic dimensions, and that's all! However from this one image and the measurements I can re-create the chair in 3D. I also used the image to measure the leg thickness, the proportions of the chair, and overall shape and size of various parts. There are some assumptions I made, such as the seat height is similar to a standard dining chair, the chair is symmetrical and the legs are circular. I had to guess other areas, such as the rear of the chair, the curve of the top bar and the shape of the seat.

3D Dining Chair Wireframe

This image shows how the chair is built in 3D. Keeping models simple, and adding detail where needed is my philosophy, and this is evident in this 3D chair. Techniques can be then applied to the model to turn the faceted geometry into smooth curves.

Generally the 3D model would then have textures and materially applied, and rendered inside a scene. This model was created for a client, who only required the 3D model without materials.

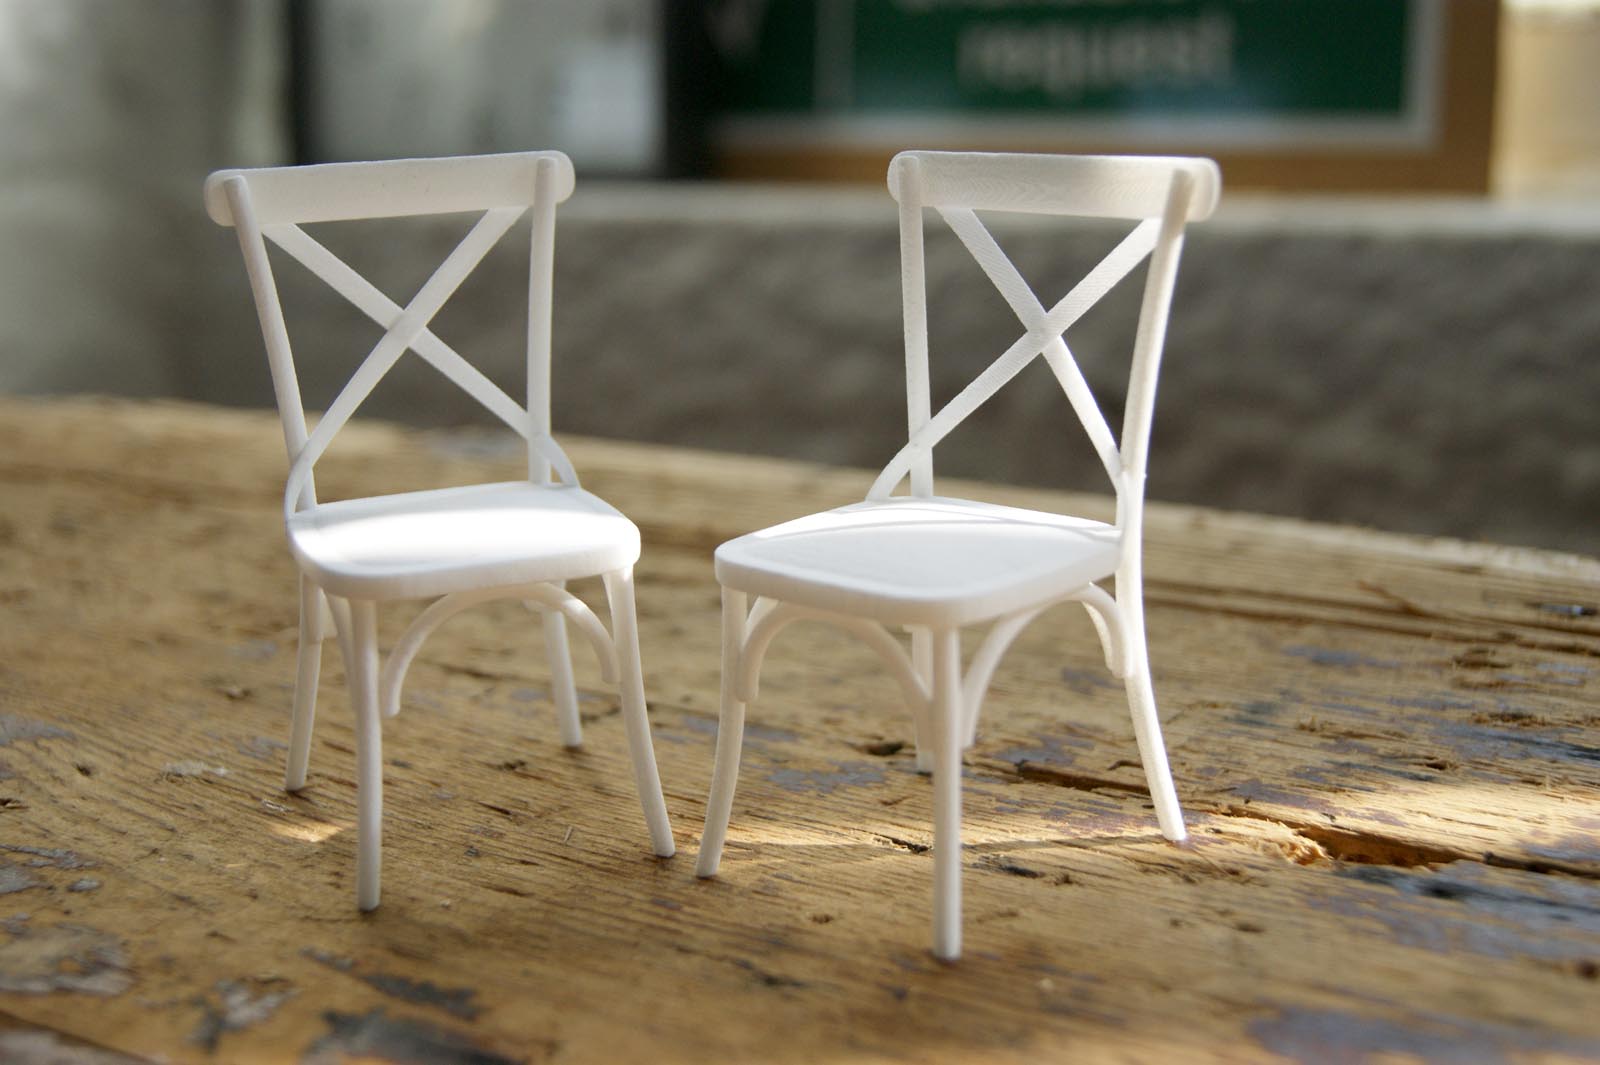
I then decided to take this model and use it as a test for 3D printing. The chair didn't require many changes to make the chair printable, however some models will require more work. When creating 3D models for visualisations, the artist will often not model parts which aren't seen, such as the bottom of the chair as this is deemed as unnecessary and time consuming, however with 3D printing, all areas of the model need to be created. Also when 3D printing models, the model needs to meet a certain specification depending of the type of 3D printer that will be used. Some printers require a minimum part thickness of 1mm, so in the case of this chair, when it was scaled to 1/1o the cross detail was thinner than 1mm, so this had to be made thicker.

Once the 3D model is complete, the 3D chair model is then sent to a 3D printing company. There are several companies, all differing in difference services and price. The one I chose to use this time was 3D Print UK. I chose to use them as their pricing is different to other 3D printing companies, as they price on the overall dimension of the 3D model, rather than volume, and as I wanted to print several items (more blog posts to follow) the overall price was better than printing each model separately.

So the 3D models were sent away, and 2 weeks later a little parcel arrived containing the prints....

3D Printed Dining Chair

3D Printed Dining Chair

The prints really exceeded my expectations, the level of detail is much better than I had expected, and the strength of the prints are good too. I wasn't sure if the little fixings would be printed, as they are slightly smaller than the minimum specification, but they are still visible.

3D Printed Dining Chair

The finish of the white nylon print is an interesting finish. To touch it feels like an Extra Strong Mint, and visually it does too. The nylon material which the models are printed with is also quite easy to mark, and can also leave little powdery marks on skin and anything else it comes into contact with, although I presume this is left from the printing process, and any loose nylon powder is soon discarded.

I ordered 2 chairs, so I could try painting and finishing a chair.

3D Printed Dining Chair

3D Printed Dining Chair

The finishing of the brown chair was done using Humbrol Airfix paints, but with nylon prints almost any type of finishing can be used. The 3D Print UK site demonstrates using aerosol paints to finish the 3D prints.

Painting and finishing the models is important with nylon prints, not only to add detail, but also to protect the prints from dirt and marks. Even if a white finish is desired, I would still use a clear finish.

3D printing is something I've always been fascinated with, and printing these chairs has only made me more intrigued and more sure that 3D printing will play a huge roll in the very near future. The quality of the prints is very good, perhaps not as detailed as traditional model making processes, but if you consider the lack of tooling needed, and the individuality 3D printing offers then 3D printing is a very viable solution, especially for one-off items, or for rapid prototyping.

The main downside with 3D printing using external companies is the lead time, which in my experience is around 2 weeks. This is still very good, however I see 3D printing as something that could be incredibly useful for rapid prototyping, testing ideas, and playing with concepts.

The other downside is price, £100 doesn't print a lot, and could soon become costly if several iterations of a model were printed. For myself, I see these external print companies useful for finished 3D models, and I plan to purchase a desktop 3D printer for testing and prototyping. Watch this space......

12/01/2013 — No Comments

Using photographic references is the key in CG!

It's no great secret that the key to creating beautiful images and animations lies with using great reference material. References come in all forms; drawings, sketches, videos, but the one area which is always very important is photography.

We all need direction, and it's often little use just relying on our own perception of something, or even using our memories. We are by nature, biased, and our memories can be hazy at best, and as such can't really be relied upon. So how can we be sure that what we are creating is correct if we only use our brain? Well to put it simply, we can't! This isn't to say that it's wrong to use your head and imagination, sometimes accuracy isn't important and we can create beautiful things without directly using reference materials at all.

However, as with many visualisations, including architecture and product based projects, accuracy is very important, and without accuracy often we find ourselves questioning each other as to what exactly is "right". One person's right might be another person's wrong, and all this leads to confusion, compromise and often wasting time. So this is where references are important.

Photographic references can be used for just about every part of a visualisation project, from how something should look in, to how a visualisation feels, is lit and graded. CAD drawings and sketches are great for accuracy, but sometimes can be very clinical, or perhaps missing the finer details, so using photographic references along side other material will generally result in a much nicer and more accurate finish.

When lighting, grading and trying to achieve a certain "feel" to a visualisation, photo references are still just as important. Traditional photography can be very straight-laced, or very creative and experimental. These varying styles used in traditional photography filter down to the CG industries and artists, and using these photo references for all styles of visualisations is important, not only for the creative, moody visualisations, but also the typical day-time shots too. Again it's all about seeing the finer details, as well as the whole picture, and not relying on memories and experiences to direct us.

I would say however, that photographic references are probably most important when it comes to working with other professions. Using references through-out a job can give clear direction to both clients and professionals. Both sides know what to expect and what to aim for. More often than not, the desired out-come will be achieved quicker and to a much better standard.

So what really prompted me to write this post? Well I initially thought I would share some references I recently found useful, and also possibly go through the best places to start looking for them for future projects, but then I thought that just showing others what I've found isn't overly useful, unless you understand where I'm coming from, and you might think I'm a bit strange posting links to random photos!

I came across this set of photo references of metal cladding when looking for references for an architectural project. These images are absolutely perfect for reference images, and well worth bookmarking, but why? When I'm looking for references, I want to see how the thing looks close-up, far away, in context, in different lighting situations, variations, and pretty much anything else that gives me a better understanding on how to recreate things in 3D. The resolution of the photographs isn't always that important, if you are using a reference for lighting or mood, then low resolution images are fine, but if you want to see every detail of something, then obviously the higher the resolution the better.

ad_blog_using_references_02

Flickr is great for reference images, the content is great, and often the photographs are of high resolution. Also Flickr supports the Creative Commons licencing, and user can choose to opt in if the wish, allowing their images to be used in commercial projects if the licence allows. Flickr is usually the first place I look and often does the trick.

Googling for photographs can also bring nice results, although it is very hit and miss, and often the images are of low resolution as these images are usually from webpages where they have been re-sized. Also anything gathered from Google will generally be under copyright, so you wont be able to use the images other than to look at.

Various other blogs exist that are useful for references. Just Google search for a blog, and one will surely come up, but here are a few I check regularly. Architecture Paste Book is almost like a digest of other blogs and websites, and provides you with a mix of subjects and styles. Although it isn't too useful if you have something specific you need to find, it can be great if you are looking for inspiration or new ideas. Design Boom is a mixed genre blog which I find inspiring to view. It can often lead you astray with interesting articles and fascinating designs, but that's half the fun with this blog, you are never sure what it'll take you too! Finally in this short list is Architonic. It nicely describes it's self as "The Independent Resource For Architecture And Design", and like Design Boom has a mixture of architecture and design, but Archit0nic is more structured and designed to be an aid to professionals, making it easy to search by manufacturer, designer, material to name a few.

I hope that gives an insight into why I think using photographic references in CG is so important, some of the on-line reference I find useful, and just a general overview too. This post has focused on what the web can bring to using photographic references, mainly because the web is so easy to use and will often give brilliant results, but don't also forget to surround your self with books and magazines and also pick up your camera and taking some pictures yourself!

Deano!

LIKE WHAT YOU SEE?

WANT TO KNOW MORE?

USEFUL LINKS

Site Map
Privacy Policy

Punch Infinity
Switch
Archive
Contact
Subscribe

INSTAGRAM FEED

Wrong or no access token.

PUNCH DIGITAL

Punch Digital Services Ltd

Registered Office :
Peel Walker
11 Victoria Road
Elland
HX5 0AE

Company No:
07938732

VAT No:
GB 282 4398 77