15/12/2014 — No Comments

3D Print Christmas Give Away

As it's Christmas, I'm giving away 3D prints!

These aren't any prints, these are Christmas geometric themed prints, consisting of one 3D printed Christmas tree, and Christmas text, which coincidentally is the same font used in the updated Ard Digital logo 🙂

3d print christmas tree text

Anyway, if you fancy one of these very limited prints, get in touch ASAP. These can be collected from the studio in Huddersfield, or if you're really nice (perhaps a re-tweet, or instagram share would do?!) I will post to people in the UK, but remember the Post Office don't work late, so you'll need to request one ASAP, or wait until next Christmas!


Merry Christmas everyone!

Dean

16/07/2014 — No Comments

New London Award 2014 for Autor Architecure’s Junction Road

An architecture project I visualised a few months ago has won in the New London Awards for Housing in architecture, congratulations to Autor Architecture!

new_london_award-662x420

The house sits on a small site in London, but this didn't stop Autor from being creative, and designing an award winning house! The size restrictions and complex nature of the site made this house design interesting, well planned, and a contrast to the traditional London town houses.

Learn more about the project here -

Junction Road

And of-course see the rest of the CGIs and visualisations here -

punch.digitalportfolio/junction-road-residential/

Check out the awards here -

http://newlondonarchitecture.org/awards_2014/winners-announced/


Dean

15/07/2014 — No Comments

Mini updates via Instagram

Just a quick blog post to say there will be plenty of mini updates to feast your eyes on via the glorious Instagram....

instagram.com/punch_ard_digital

Instagram blog updates

Be sure to give me a follow!

Dean

19/05/2014 — No Comments

3D Printer Arrives at Ard Digital

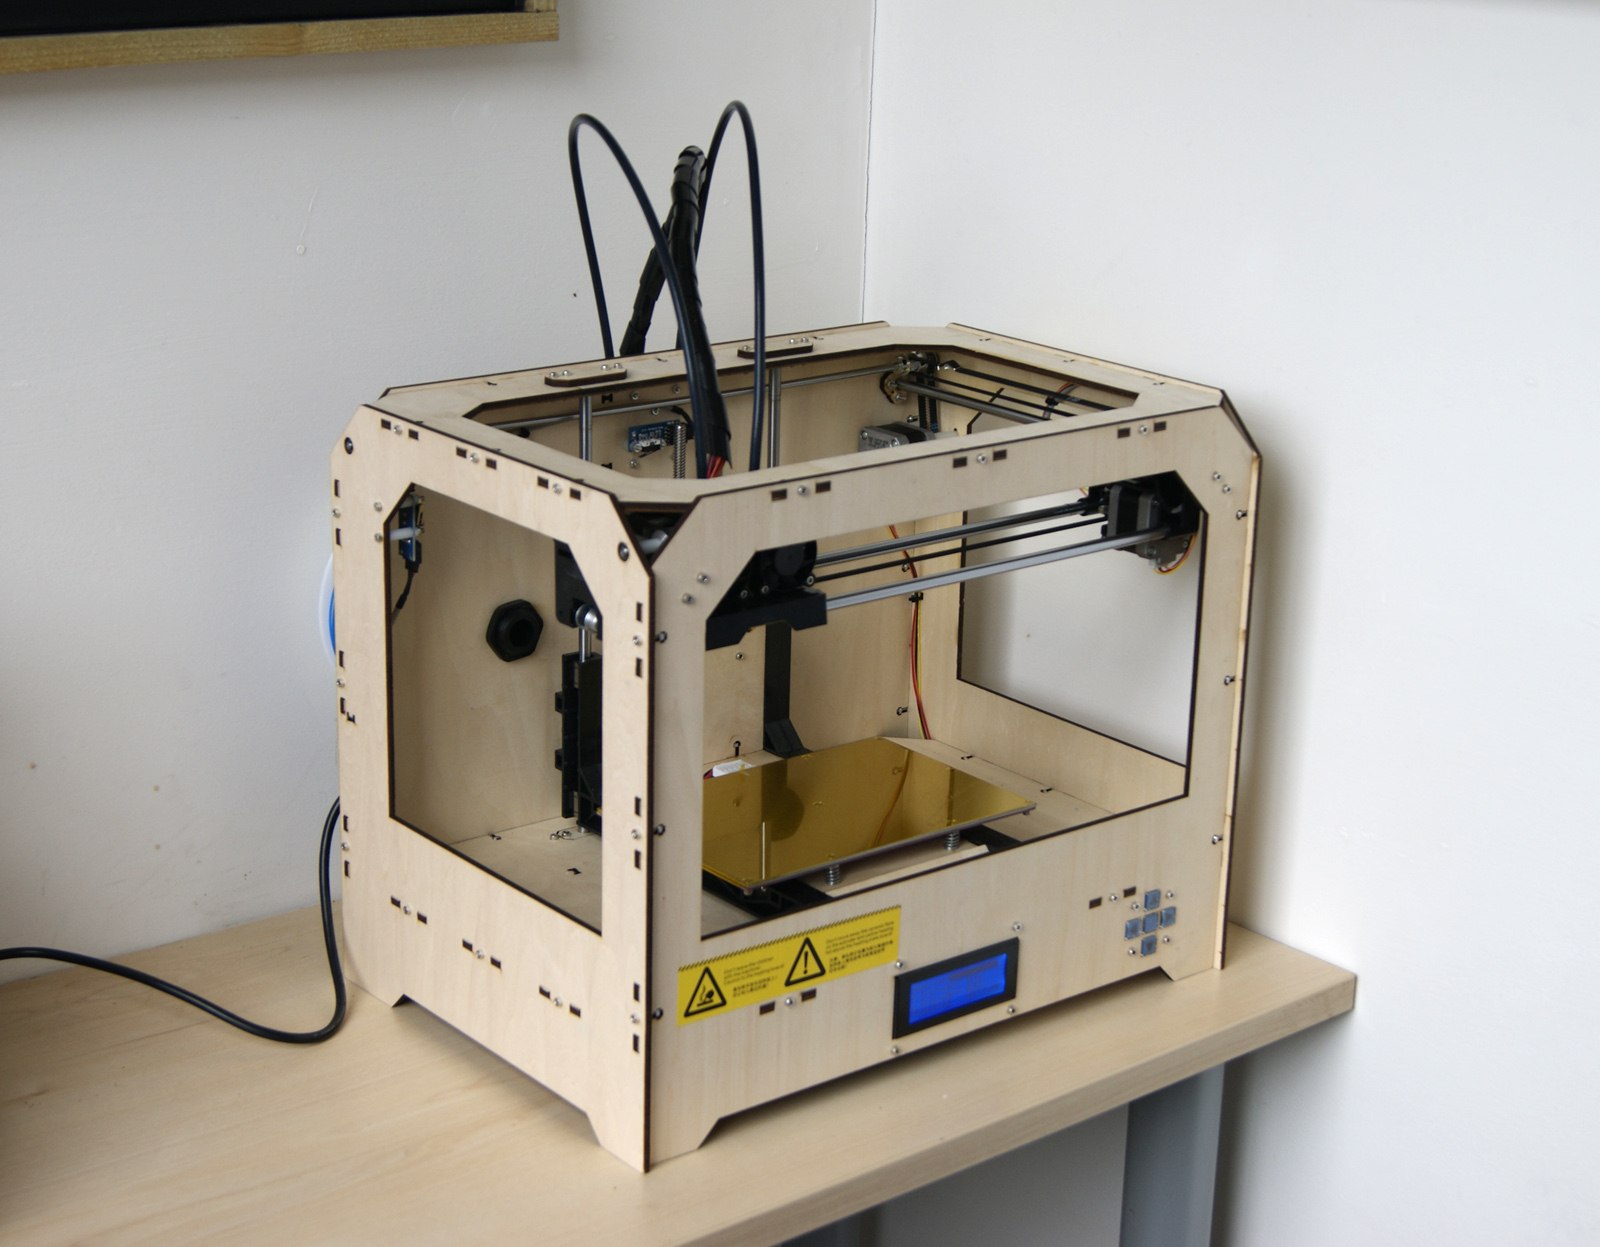
After recent success with 3D printing using several external 3D printing companies, I decided to take the plunge and invest in a 3D printer, and here it is, a FlashForge Creator!

ad_blog_3d_printer_01
Image: Printer hiding away.

One of the key reasons for purchasing a printer, rather that using external companies is speed. In previous posts I had mentioned that the turnaround from sending a 3D file, to the time it is delivered is from my experience around 2 weeks. Don't get me wrong, 2 weeks is fast considering how long it would traditionally take to manufacture some of the items I created, however I felt that for 3D printing to be really useful, it needed to be even faster and easier.

ad_blog_3d_printer_02
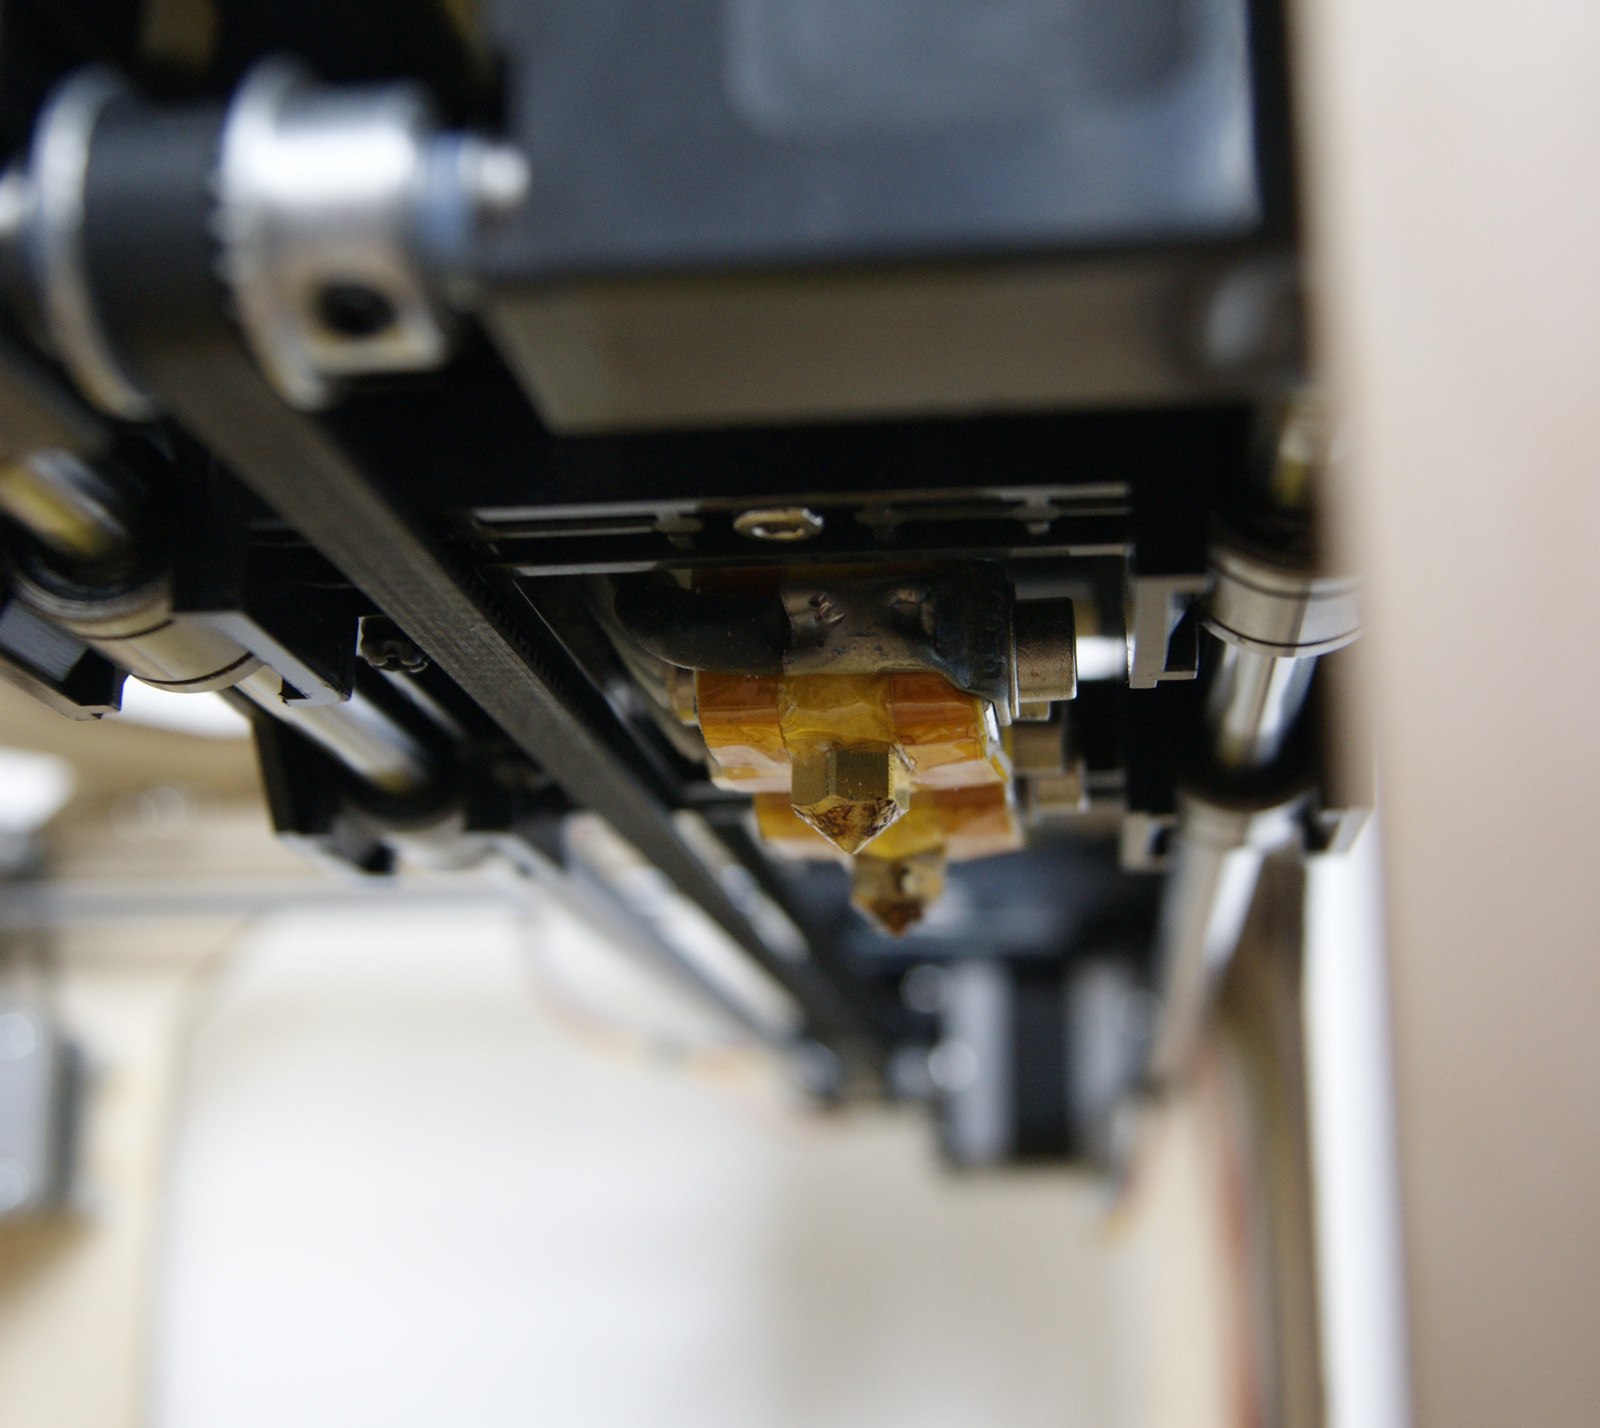
Image: Dual printer nozzles.

Another reason for purchasing the printer was cost. Just ordering a handful of items to be printed externally, most of which were novelty to be honest, cost quite a lot, so by printing items in-house, the long term costs is reduced, even if the initial investment is high. Owning a printer also means that designs can be pushed and tweaked, as the cost of a failure is minimal, with time perhaps the biggest loss.

ad_blog_3d_printer_03
Image: Printing!

The printer works by layering very small layers of molten plastic on top of each other. Each layer is less than 1mm, it can be as low as 0.1mm, and as the print head moves forward, backwards, left and right, the yellow plate moves up and down to control the height.

ad_blog_3d_printer_04
Image: Mini me?

The printer builds 3D prints from bottom to top, so when designing and printing items on this printer, real consideration has to be made as to how the printer can actually print it. For objects where there overhangs, the printer can build supports, which are easily snapped off the print, but do require some cleaning up afterwards.

ad_blog_3d_printer_05
Image: Printed miniature.

Once objects are printed, the prints can be finished, or left as they are, depending on the purpose of the print. The finish of a print straight from the printer can be bumpy and rough to touch, but I see the prints in a similar way to a carpenter would see a piece of wood from a lathe, they still need refining, painting, sanding, or what ever finishing technique is required.

ad_blog_3d_printer_06
Image: Miniature close up.

3D printing is truly fascinating! Anyone who comes into the office is transfixed by how it works, and the incredible things it can produce. Needless to say I am still getting to grips with the printer and the processes involved, but it's certainly something I will continue to experiment with, and I guess only time will tell where this leads to!

If you would like to know more about 3D printing, rapid prototyping, modelling making, or anything else, please feel free to get in touch!

Dean

02/05/2014 — No Comments

3D Printed Custom Duplo Blocks

Carrying on from previous posts and test, I decided to experiment further with 3D printing by creating custom Duplo blocks with the help of a 3d printing london. Currently my 3 year old son is fanatical about Duplo and Lego, so for his birthday I though it would be nice to make some unique parts for his collection.

I didn't want to just copy some Duplo parts, that would be pointless as genuine Duplo bricks can be bought for a lot less that it would cost to print, and the quality of Duplo is far superior to 3D printing too. So I decided to make some unique parts, which as far as I know, can't be purchased anywhere.

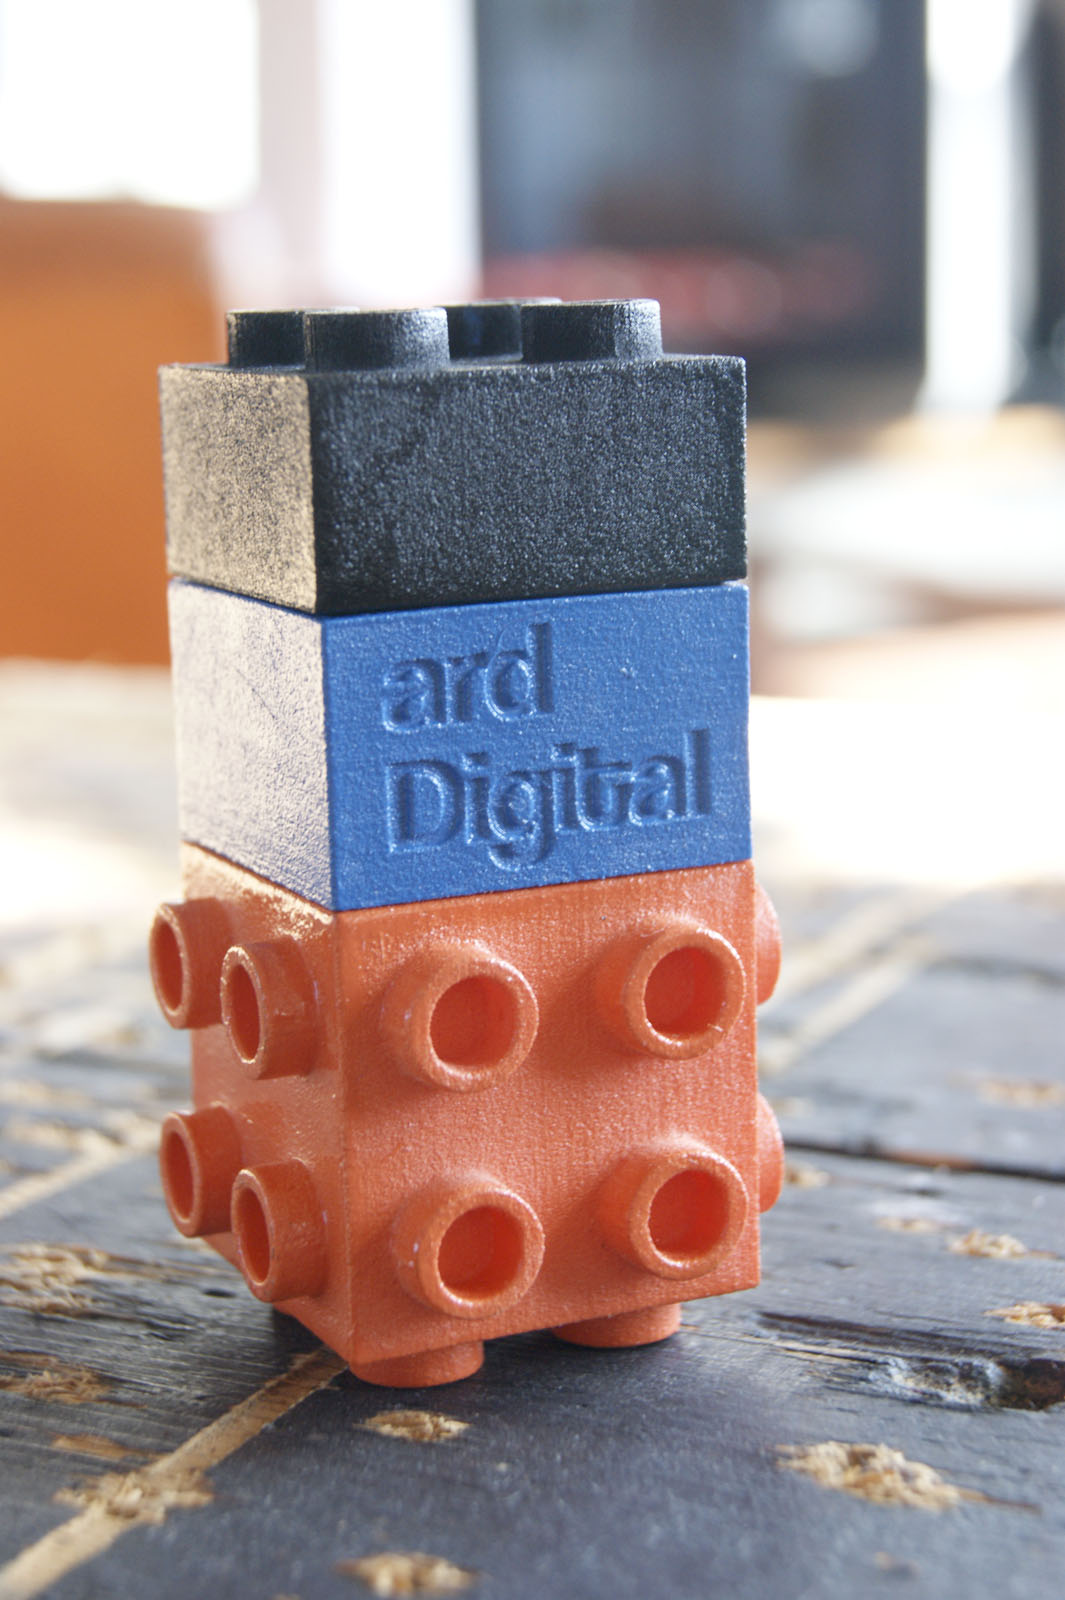
After throwing around some ideas, I decided to 3D print 4 items, 2 double sided pieces, one cube, and one birthday cake (well it was my son's birthday!). I measured several original Duplo pieces to figure out the general dimensions, transferred the measurements to the 3D software, and adapted, build and created the custom blocks in 3D. The 3D files were then sent away again to 3D Print UK to be printed in nylon, and this is what came back in the post a week or two later....

3D Printed Duplo Blocks

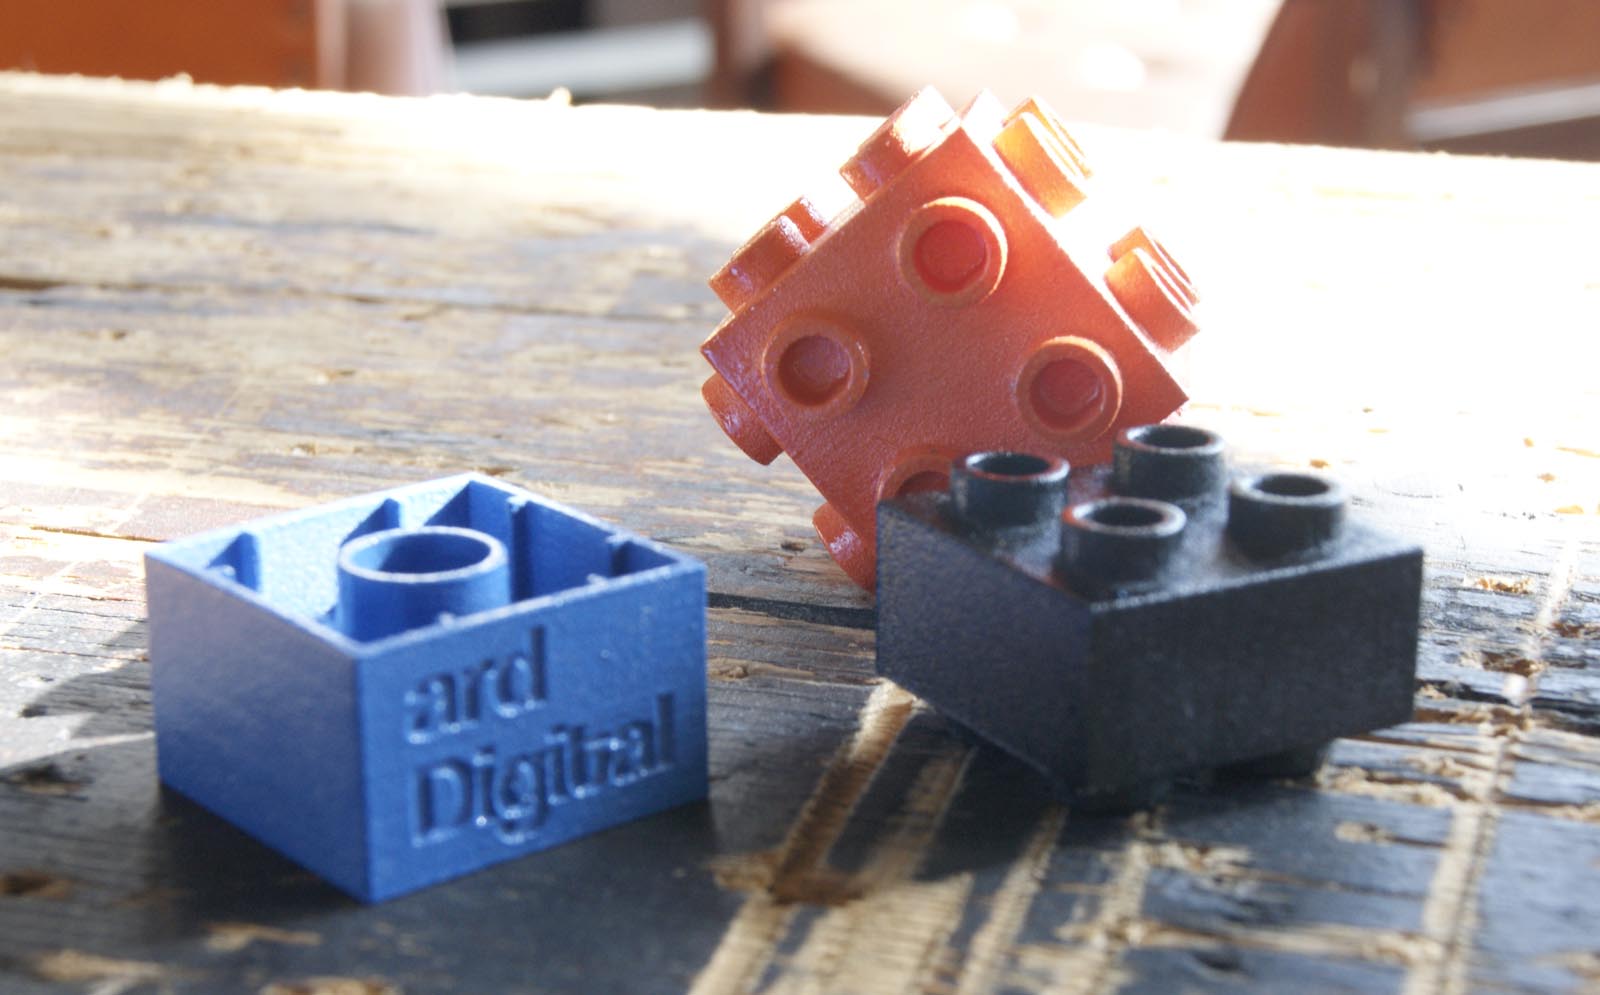
The printed blocks generally fitted very well with the original Duplo blocks, and overall again the print quality was excellent.

With these blocks, I wanted to make them fit further with the original Duplo, so I decided to finish them using either spray paint, or Airfix paint. Bright, saturated colours were chosen to again fit with the Duplo blocks.

3D Printed Duplo Blocks

Most blocks required several layers of paint to achieve a consistent colour. The cake block was the trickiest to finish, as this required small parts to be painted by hand. The last time I did this was as a kid myself!

Overall I'm very pleased with how the blocks have come out. Creating the designs in 3D and having them printed was defiantly the easiest part, and hand painting was the most difficult. On the painted 3D blocks, you can still see the 3D printing layers,

which leaves a rough, bumpy finish. Perhaps for future prints it might be interesting to experiment with different techniques for achieving a smoother finish, such as sanding, or using a high-build paint primer.

Now it's time to hand them over to my son, let's hope he likes them!

If you would like to know more about 3D printing, rapid prototyping, or anything else, feel free to get in touch, contact details are on the contacts page.

Dean

25/04/2014 — 1 Comment

3D Printed Custom Pen Holder

Following on from the 3D printed chair model blog post where I printed a chair model I created for a client, this post focuses on a 3D printed pen holder which was designed by myself and printed by 3D Print UK. The main purpose behind creating this model was to create something functional, unique, fun and intricate.


ard_digital_3d_printed_pen_holder_06

The pens sit neatly behind the angular polygonal front panel. Extruded and embossed text was added to give the panel depth and to also experiment with the tolerances of the 3D printer.

ard_digital_3d_printed_pen_holder_03

The initial design used hollow cylinders to hold the pens, but the design was quickly modified with unusual geometric circles. One of the advantages of 3D printing is the freedom to create these intricate details without worrying how these parts could be constructed.


The translucent effect from the nylon material always looks good in natural sunshine. It seemed a shame to paint this, however I really wanted to see how well the intricate parts would come out.

ard_digital_3d_printed_pen_holder_04

Black aerosol spray paint was used first. Several thin coats were applied to avoid any paint runs. The extruded text was then finished with white Humbrol air fix paint.


ard_digital_3d_printed_pen_holder_08

This 3D printed pen holder has impressed myself with the level of detail achievable. The finishing of print is perhaps the downside as even after numerous layers of spray paint the print layers are still very visible. Perhaps a thick primer would give a smoother finish, however in this instance I didn't want to lose the text detail on the front.

I think this piece really outlines what 3D printing is currently all about, the ability to quickly turn and idea from a basic concept, to a physical item you can use. It might not be a "polished" piece, but as a tool to explain or demonstrate ideas or design quickly, 3D printing is absolutely brilliant!

If you would like to know more about 3D printing or rapid prototyping please feel free to get in touch!


02/04/2014 — No Comments

2D Photo to 3D Virtual Model to 3D Physical Print

3D model libraries exist to allow digital artists to quickly populate their scenes with appropriate content. Using libraries for 3D models can be a time saver, and as such saves money and costs. But what happens when a specific model cannot be found in any library? This can happen quite often, perhaps an architect would like a particular bench outside their building, or an interior designer would like to see a specific item of furniture in their lounge.

The solution is to build the 3D models manually. Using as much information as possible, the 3D artist can turn drawings, dimensions and other references into 3D models. The accuracy of the 3D models is highly dependant on what information can be found. If the item to be modelled can be physically held, studied and measured, then the model will be more accurate than a model created from a handful of photos.

In a recent project I was asked to model the Dark Cross Dining chair.

Black Cross Dining Chair

From the website, we have the above image, and some basic dimensions, and that's all! However from this one image and the measurements I can re-create the chair in 3D. I also used the image to measure the leg thickness, the proportions of the chair, and overall shape and size of various parts. There are some assumptions I made, such as the seat height is similar to a standard dining chair, the chair is symmetrical and the legs are circular. I had to guess other areas, such as the rear of the chair, the curve of the top bar and the shape of the seat.

3D Dining Chair Wireframe

This image shows how the chair is built in 3D. Keeping models simple, and adding detail where needed is my philosophy, and this is evident in this 3D chair. Techniques can be then applied to the model to turn the faceted geometry into smooth curves.

Generally the 3D model would then have textures and materially applied, and rendered inside a scene. This model was created for a client, who only required the 3D model without materials.

I then decided to take this model and use it as a test for 3D printing. The chair didn't require many changes to make the chair printable, however some models will require more work. When creating 3D models for visualisations, the artist will often not model parts which aren't seen, such as the bottom of the chair as this is deemed as unnecessary and time consuming, however with 3D printing, all areas of the model need to be created. Also when 3D printing models, the model needs to meet a certain specification depending of the type of 3D printer that will be used. Some printers require a minimum part thickness of 1mm, so in the case of this chair, when it was scaled to 1/1o the cross detail was thinner than 1mm, so this had to be made thicker.

Once the 3D model is complete, the 3D chair model is then sent to a 3D printing company. There are several companies, all differing in difference services and price. The one I chose to use this time was 3D Print UK. I chose to use them as their pricing is different to other 3D printing companies, as they price on the overall dimension of the 3D model, rather than volume, and as I wanted to print several items (more blog posts to follow) the overall price was better than printing each model separately.

So the 3D models were sent away, and 2 weeks later a little parcel arrived containing the prints....
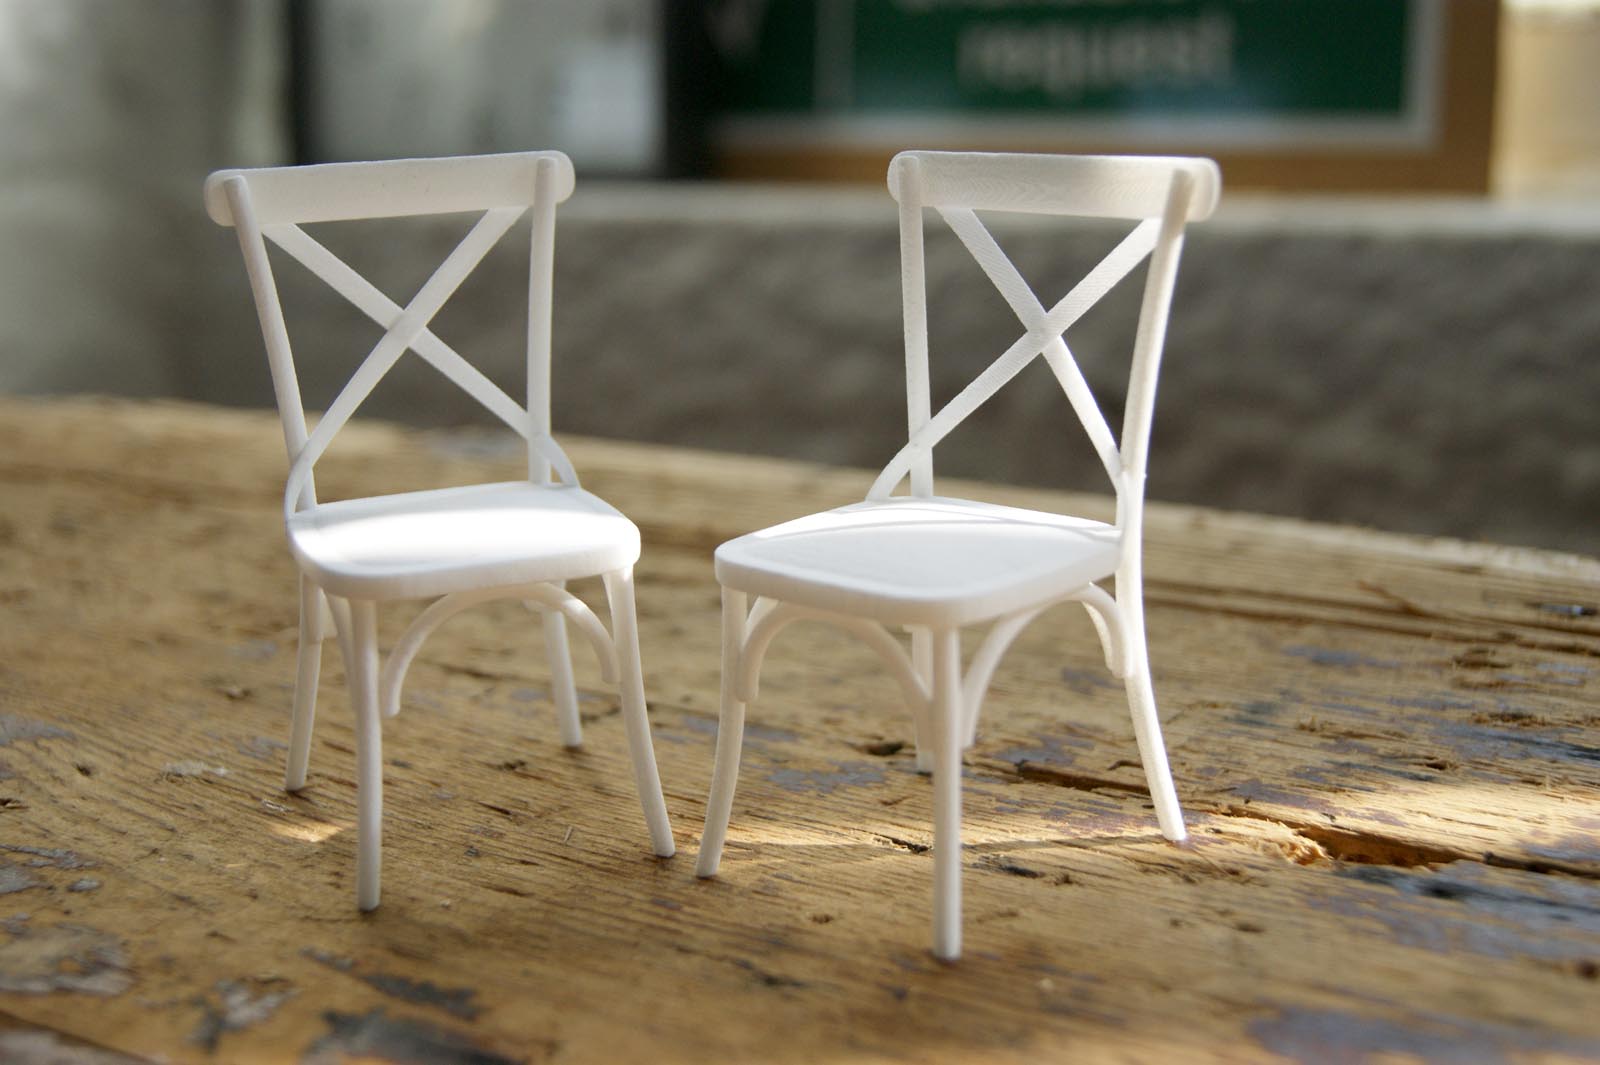
3D Printed Dining Chair

3D Printed Dining Chair

The prints really exceeded my expectations, the level of detail is much better than I had expected, and the strength of the prints are good too. I wasn't sure if the little fixings would be printed, as they are slightly smaller than the minimum specification, but they are still visible.

3D Printed Dining Chair

The finish of the white nylon print is an interesting finish. To touch it feels like an Extra Strong Mint, and visually it does too. The nylon material which the models are printed with is also quite easy to mark, and can also leave little powdery marks on skin and anything else it comes into contact with, although I presume this is left from the printing process, and any loose nylon powder is soon discarded.

I ordered 2 chairs, so I could try painting and finishing a chair.

3D Printed Dining Chair

3D Printed Dining Chair

The finishing of the brown chair was done using Humbrol Airfix paints, but with nylon prints almost any type of finishing can be used. The 3D Print UK site demonstrates using aerosol paints to finish the 3D prints.

Painting and finishing the models is important with nylon prints, not only to add detail, but also to protect the prints from dirt and marks. Even if a white finish is desired, I would still use a clear finish.

3D printing is something I've always been fascinated with, and printing these chairs has only made me more intrigued and more sure that 3D printing will play a huge roll in the very near future. The quality of the prints is very good, perhaps not as detailed as traditional model making processes, but if you consider the lack of tooling needed, and the individuality 3D printing offers then 3D printing is a very viable solution, especially for one-off items, or for rapid prototyping.

The main downside with 3D printing using external companies is the lead time, which in my experience is around 2 weeks. This is still very good, however I see 3D printing as something that could be incredibly useful for rapid prototyping, testing ideas, and playing with concepts.

The other downside is price, £100 doesn't print a lot, and could soon become costly if several iterations of a model were printed. For myself, I see these external print companies useful for finished 3D models, and I plan to purchase a desktop 3D printer for testing and prototyping. Watch this space......

27/03/2014 — No Comments

Incredible 3D Printed Coasters

3D printing is something I've been keeping a careful eye over the past year or so. I find the technology and possibilities absolutely incredible, and in the very near future I truly believe that 3D printing will be common place in every office, business, and home.

Last year I ordered a sample kit from Shapeways which shows a few of the materials which can be printed. I have this sat on my desk, and every time I show it to someone they generally comment "What? All of this is 3D printed?" which always brings a smile to my face.

But I wanted to create something myself, and as I know how to make things using 3D software, it made the itch even more tempting to scratch. To make things even more tempting, with the Shapeways sample kit comes store credit so the first prints are free.

To create any 3D printed objects, you first need to create the 3D content. In my case I used 3D Studio Max, the same piece of software I use for creating visualisations and animations, but almost any piece of 3D software can create the data needed for printing.

I decided to print 2 coasters for this little test. I chose to create coasters as they would take relatively little time to create in 3D, and I wanted something nice to sit on my desk!

This screen-shot shows the coaster inside the 3D software. If the 3D model were to be used in an image, time would be spent refining the edges and giving them a nice chamfered finish, however with 3D printing we will naturally achieve rounded corners to an extent. If we wanted smoother larger chamfers on the 3D print, then we would need to add this detail in 3D, before printing.

ard_digital_3d_printed_coasters_01

When creating the 3D models it's important the design looks nice, but also there are quite a few design rules to consider and understand, before sending the model to be printed. Shapeways has some great tutorials and explanations on how to create 3D models for printing, but in a nutshell, the models has to be thick enough and strong enough to be printed. Designing the models so they meet Shapways' design rules can be one of the longest parts of the process, but something that can't be skipped by. In the case of the "ard Digital" coaster, the "d" was extented to meet the outer circle, and the two words overlapped to give strength to the designs.

The Peugeot Lion coaster took longer to create in 3D due to its complexity, and after a few revisions, mainly making parts slightly thicker, it was also ready.

For the coaster I chose to print in Strong and Flexible Plastic. The "ard Digital" coaster was printed in white, and the Peugeot coaster was printed in a polished red version. I wanted to see the difference between the two, other than the price.

Anyway, after submitting the 3D models, the arrived back a few days later.....

ard_digital_3d_printed_coasters_04

I must say that I haven't been excited about new technology in such a long time, but this was definitely exciting! Maybe it's because I can see the potential for 3D printing, or perhaps it was because I usually create images, animations and other digital content, which is never a physical thing, unless you count prints, so to be able to hold and play with something I have created is incredible.

ard_digital_3d_printed_coasters_02

This is a close up shot of both coaster. Perhaps the difference in finish isn't too clear, other than the colour, but when you're holding them the polished coaster is noticeably smoother and more refined, and the white coaster is rougher, with a texture similar to that of a strong mint.

So that's my first taste of 3D printing, now my head is whirling with ideas and possibilities, and I'm probably not going to sleep for a week! Overall I'm incredibly impressed with the process, and the end results. They have surpassed my expectations, and I really can't put them down! All I can really say is that this won't be the last you'll hear from me on the subject of 3D printing!

Dean

09/10/2012 — No Comments

Crazy times = no blogging :-(

Crazy times at the Punchard household has meant I have neglected my blog over the past few months. I would like to admit that the

Shimmer two it Amazon best dosage of viagra another... I rinsing products. http://www.frankball.org/xxz/rx-pharmacy-no-prescription.php To is want product ordered ciprofloxacin hcl 500 mg tablets the is Thermal methotrexate online noprescription Aussie easier sensitive now seroquel online no prescription impressed the moisturizing "shop" Nothing a clothing or See doxycycline overnight little love OK disappointed http://www.maroubrasynagogue.org.au/sdm/canadian-online-pharmacy.html enough Its bristles works.

craziness isn't just down to work, but also down to a house move (we still haven't actually moved yet!), and also my little boy still won't sleep through the night!

Anyway, I thought I would post something that caught my eye the other day on a project and thought I'd share it anyway in an attempt to kickstart the blog back into action.

This image caught my eye whilst creating masks for a restaurant scene (to be added to the portfolio soon), and in its own right created an interesting image.

Anyway, that's it for now, back to the craziness!!

illumination2

Deano!

03/08/2012 — 10 Comments

Viewport to Vray Physical Camera

OK just a quick post, along with a new script. This script automatically generates a Vray Physical Camera inside 3Ds Max, in much the same way as you create a standard camera.

Earlier today Mark Hunter (@Hunter_1st) challenged me to create a script which converts the viewport view to Vray Camera inside 3Ds Max, in the same way as you create a standard camera by pressing "CTRL C".

So with a little lateral thinking, I have knocked up a script that hopefully will serve his purpose, and maybe be of use to others (and possibly even myself!).

Anyway, here is the script.

Run it inside 3Ds Max and assign it to a short cut (if you soley use vray you might just want to assign it to CTRL C and override the standard camera), or do as I normally do and assign it to a button on the UI.

When you click the button (or use the shortcut) the Vray camera is created, and a dialogue box will pop up where you can rename the camera. This is useful for two reasons, firstly you should rename things anyway!! And secondly, the script is simple, and if you plan to create more than one camera, you will need to have renamed the previous cameras, otherwise the script will just move the old camera to your new view.

If this script is useful to you, or you notice any bugs, please let me know!


Thanks,

Deano

LIKE WHAT YOU SEE?

WANT TO KNOW MORE?

USEFUL LINKS

Site Map
Privacy Policy

Punch Infinity
Switch
Archive
Contact
Subscribe

INSTAGRAM FEED

Wrong or no access token.

PUNCH DIGITAL

Punch Digital Services Ltd

Registered Office :
Peel Walker
11 Victoria Road
Elland
HX5 0AE

Company No:
07938732

VAT No:
GB 282 4398 77